A schedule in Cirrus is considered to be a booking or planning of the assessment. It contains which assessment will take place and for which candidates in what time window. This article gives you an introduction of scheduling
Introduction to scheduling
Begin by clicking on the ‘Delivering icon’ icon in the left-hand panel of Cirrus, the Delivery Overview page will open showing the 'Schedule-' and 'Invigilation'-tab.
On the 'Schedule-tab' you’ll be able to see any schedules that have already been created.
- The overview shows a list of active schedules for your account depending on your filter. You can click on the Title of the schedule to continue editing it.
- You can customize your column + sorting
- Use the filtering to adjust your views.
- Click the '+ Add schedule' button to create a new schedule.
- You can use the search bar to search for schedules.
(Please note: the scheduled window is different from the duration of the test!). Y
Using Collumns & filters
Cirrus is gradually rolling out a new table component across the entire platform.
Customizing Columns
Columns give you an overview of the available data. However some of the collumns are hidden. You can:
- Click on the 'i' icon to see an overview of all available data and thus columns.
- Click on the 3 vertical dots on the right side of the collumns header to add or disable collumns.
- Drag & drop to arrangement the collumns
All personalizations of columns are saved and linked to your account. If you log in somewhere else, the columns will be the same. Handy if you work on different computers.
Using Filters
Apply filters to your table in order to narrow down the results on your screen.
The available filters might differ per screen.
Export button
The export button will export the table columns in excel.
This will include the hidden columns that are only visible from clicking on the 'i' icon.
The export button is not available on every page.
Selecting an assessment for your schedule or booking
- Go to Delivering > Schedule overview tab
- Click on the '+ Add schedule' button in the schedule overview tab:

-
The dialog 'Add new schedule' page will open with a list of published exams available to you for booking.
-
Only the assessments will appear for which your user is set to be 'Available for scheduling' on the assessment options
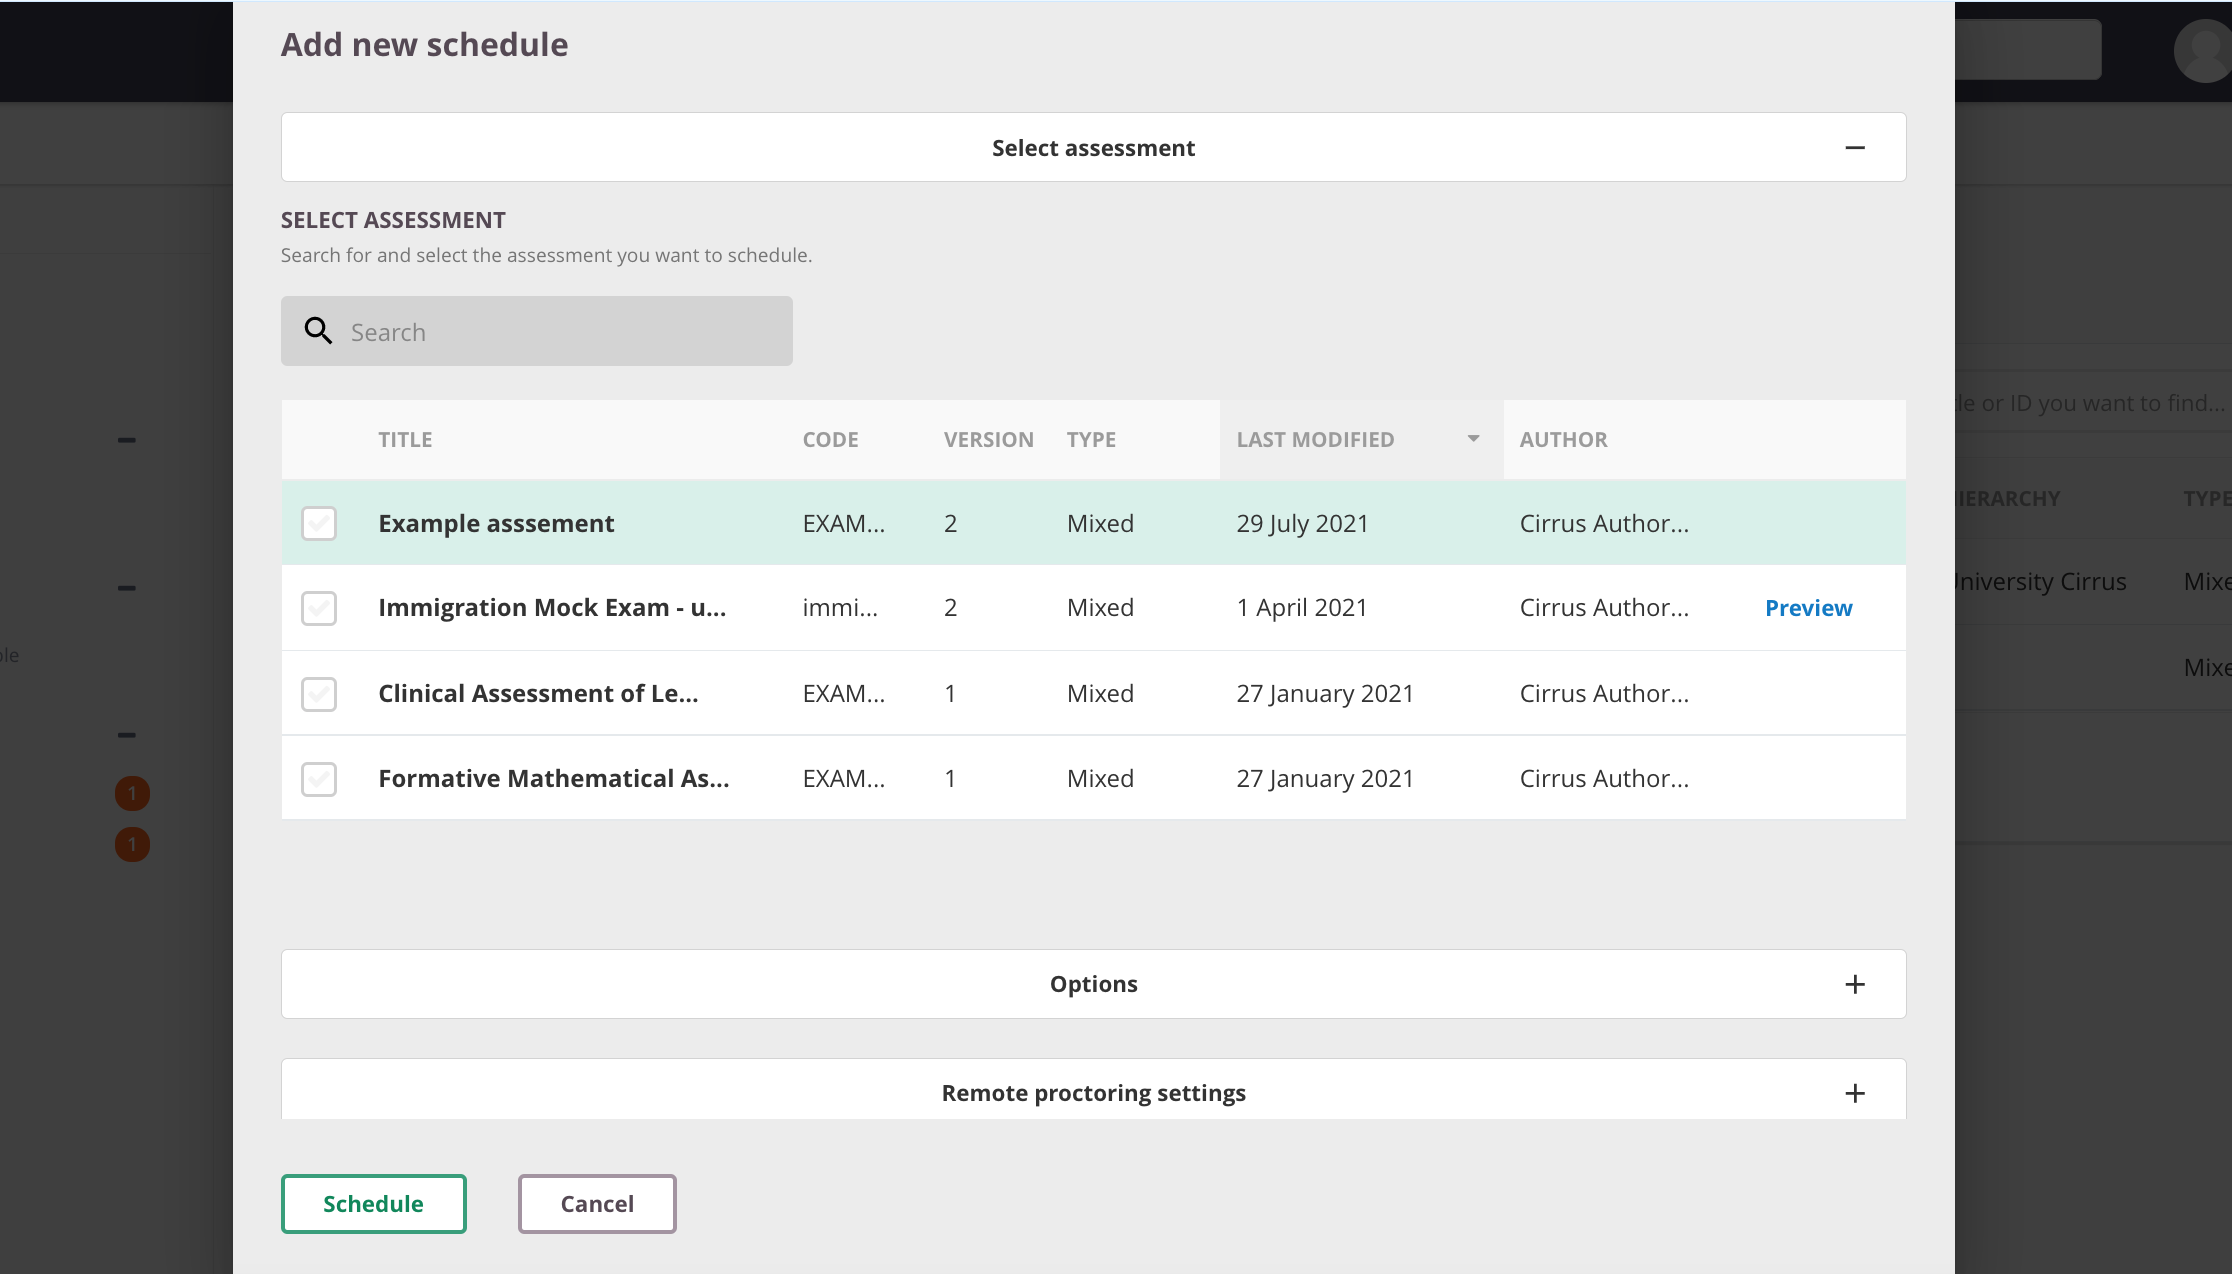
Example of the 'add new schedule' - a pick list to select the assessment you want to schedule:
- Use the search box to narrow down the list by searching for a specific title for example
- Listed are Title (Code), Type (Summative, Formative or Mixed) and the version number for the assessment.
- You can see which user is the owner and when the assessment was published
- Thick the checkbox a assessment listed to see to schedule the exam
- Click 'Schedule' to start creating your booking or 'cancel' and go back to the overview page.
Previewing when scheduling:
Some of our customers want to enable schedulers to preview their assessments completely. This can for example be used in class to discuss formative assessment in greater detail. To enable this:
- For the assessment(s) enable Anonymous Sharing
- In Admin > Roles under 'Delivery' allow for 'Allow previewing of assessments' for the role of the scheduler
- Under Delivery on the Scheduling-tab find and click on your assessment.
- A 'preview button' will be available
Information to be set when scheduling an assessment
The next links will lead to the necessary and optional steps to create your schedule so candidates can take their assessment at the allotted date and timeframe:
- Create a schedule
- Update/change schedule
- Schedule dashboard overview
- Adding Candidates to a Schedule
- Adding Invigilators to a schedule
- Activating the Schedule
- Assessment options schedule overview
Important notes when scheduling:
- We strongly recommend you to create a separate account for scheduling, that can be shared between those responsible for booking exams.
- Psychometric data will be calculated once the schedule is ended or ALL results are submitted, more details.
- Tip: admins can see all schedules via Admin > Content Management > Schedules.
- Once an assessment has been published (i.e. set to Live), it will be available for scheduling.
- Existing schedules will always use the latest published version - if publishing is done more than 15 minutes before the start of the schedule. (Recognisable by the green arrow and Published: Yes)
- Once an assessment has been taken, there are only very limited possibilities to edit it - you can only make some textual changes to items (to correct typo's for instance).
- Alternatively to amend the assessment it is best to create a new version of the assessment. As soon as the version is published any schedules that have not started yet will use the new version.
- Schedules that have started or expired cannot be deleted. The latter will move to 'Archived' once finished.
- You can archive the 'old' assessment so it won't be selectable for scheduling any more.
Access to all schedules or to those for my team or my centres/faculty
Access to all schedules on the environment or to those for my team or my centres/faculty
How can we see all schedules that our centres / faculties or users have set up?
Answer: you can only see the schedules that you yourself have set up.
But there are several ways around this - which allow you to see all assessment schedules:
- Setup access to Delivering > Invigilation tab. See Access to the invigilator overview tab and candidate logs for non-invigilators
- Admins can go to Content Management > Schedules which shows an overview of all schedules. The hierarchy, code or external ID can be used to recognise your centres schedules.
- System Admins can use the log-in as functionality to access schedules setup by centre accounts.
- Additionally: when you schedule via an integration these schedules will be accessible for the scheduler account setup under Admin > External API.
- You can share one account for scheduling of course.