
This article explains how to create a schedule and describes the key options.
To create a schedule, click the Add icon in the schedule overview. A pop-up will appear with:
- Select Assessment
- Options
- Remote Proctoring settings
Select assessment
Select the assessment to schedule by ticking the checkbox. Use the search field to filter the list.
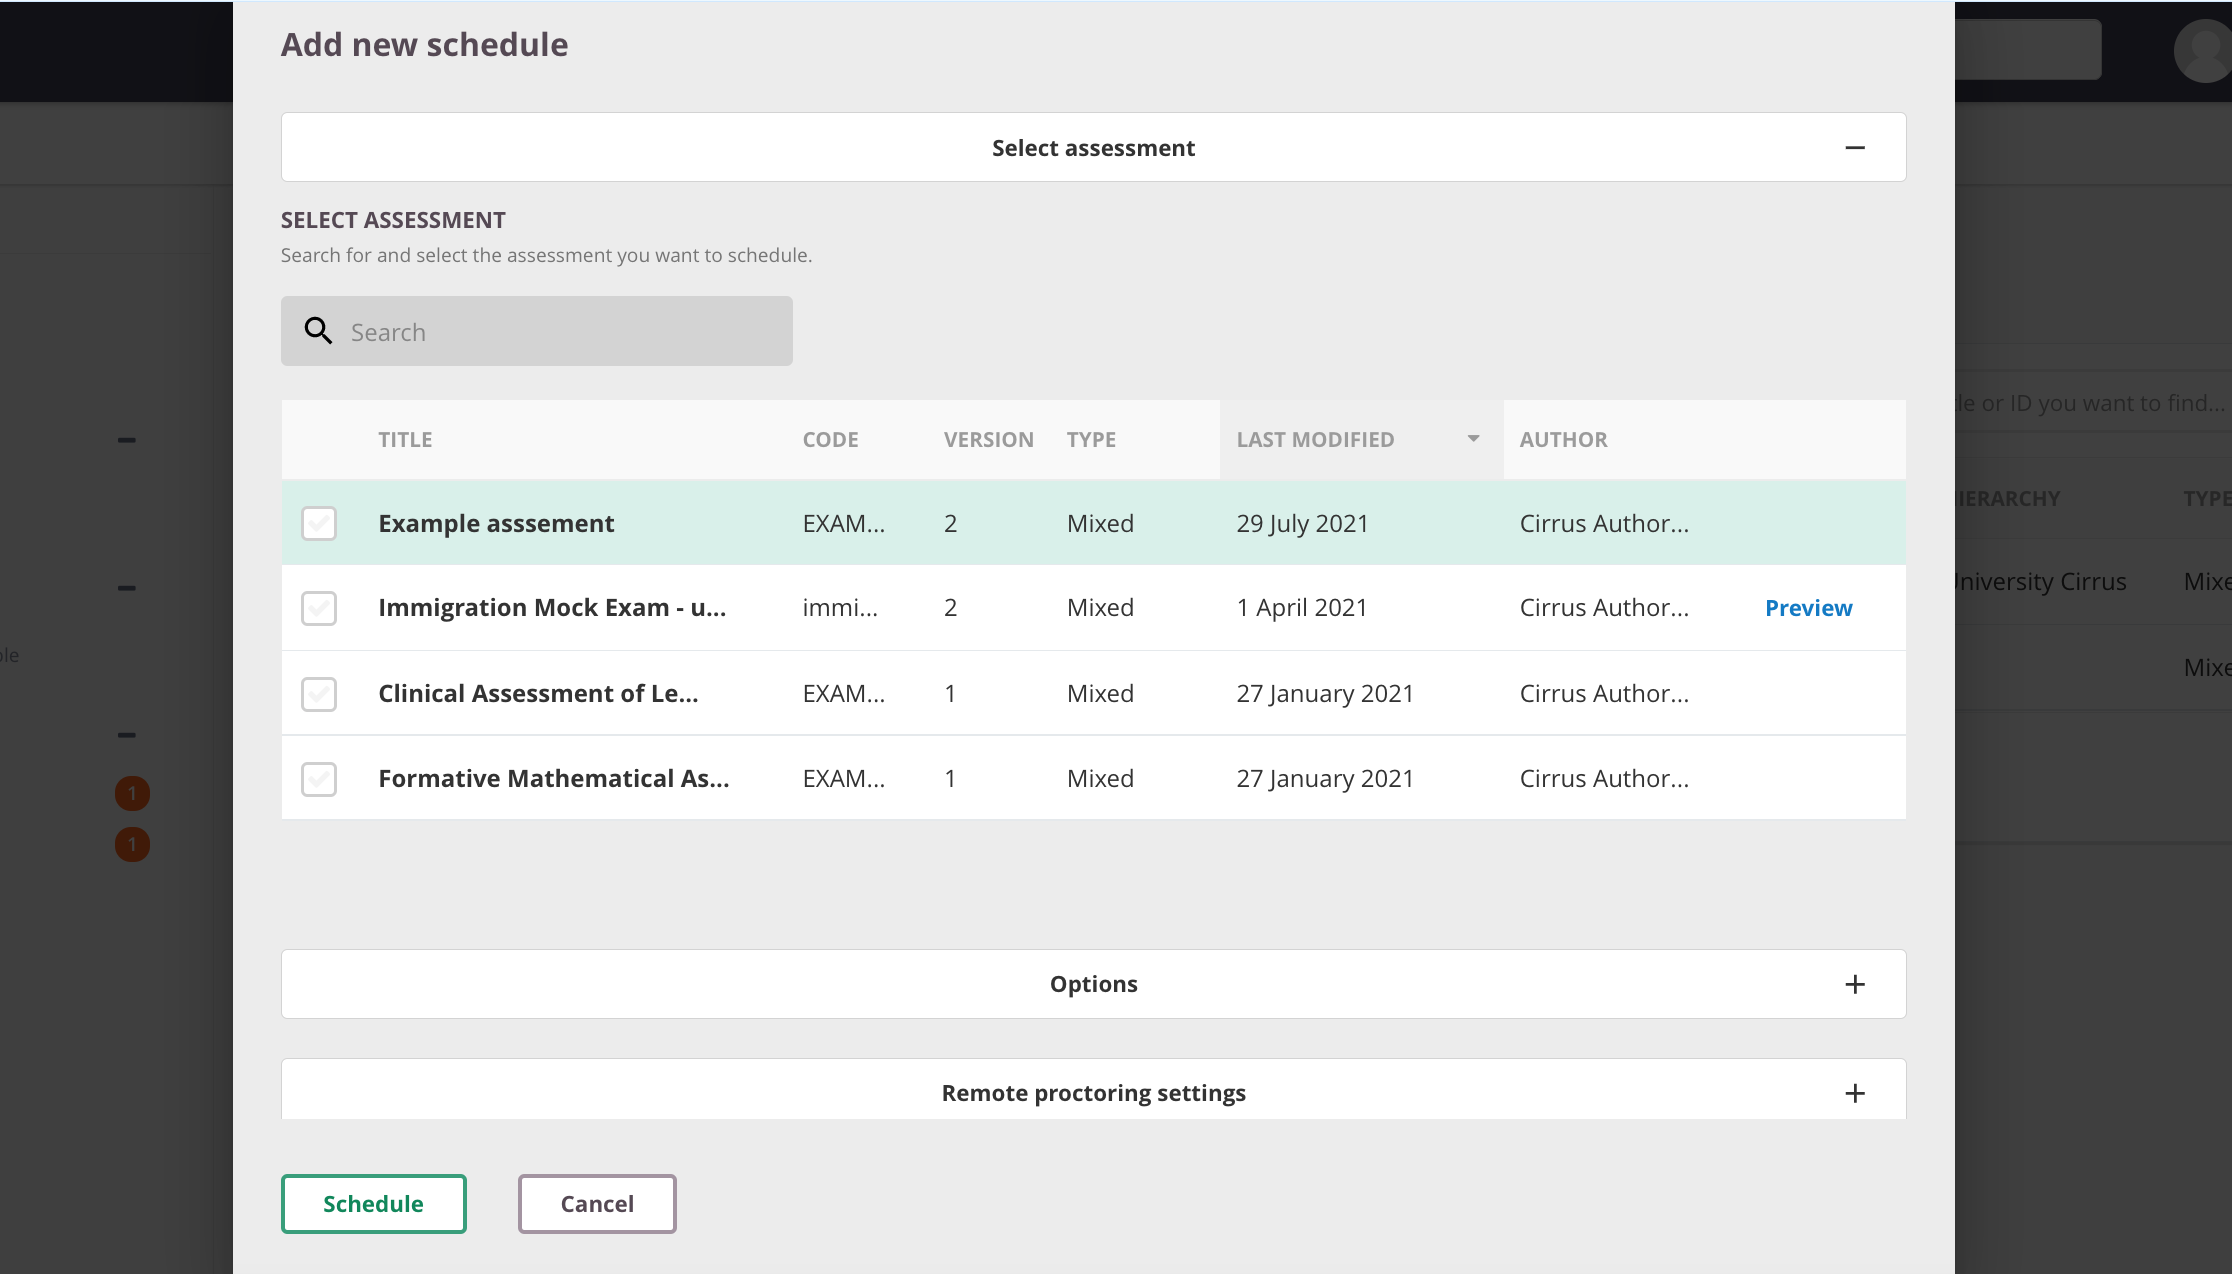
Schedulers see a list of all assessments they are permitted to schedule, based on the assessment setting Available for scheduling.
Check the following:
- Has the assessment been published by the assessment creator?
- Are you in the Hierarchy or cluster listed in the assessment's Available for scheduling setting?
To preview an assessment that is not shared with you, ask the assessment creator to enable the Anonymous link option. If enabled, a preview link will appear.
Schedule options
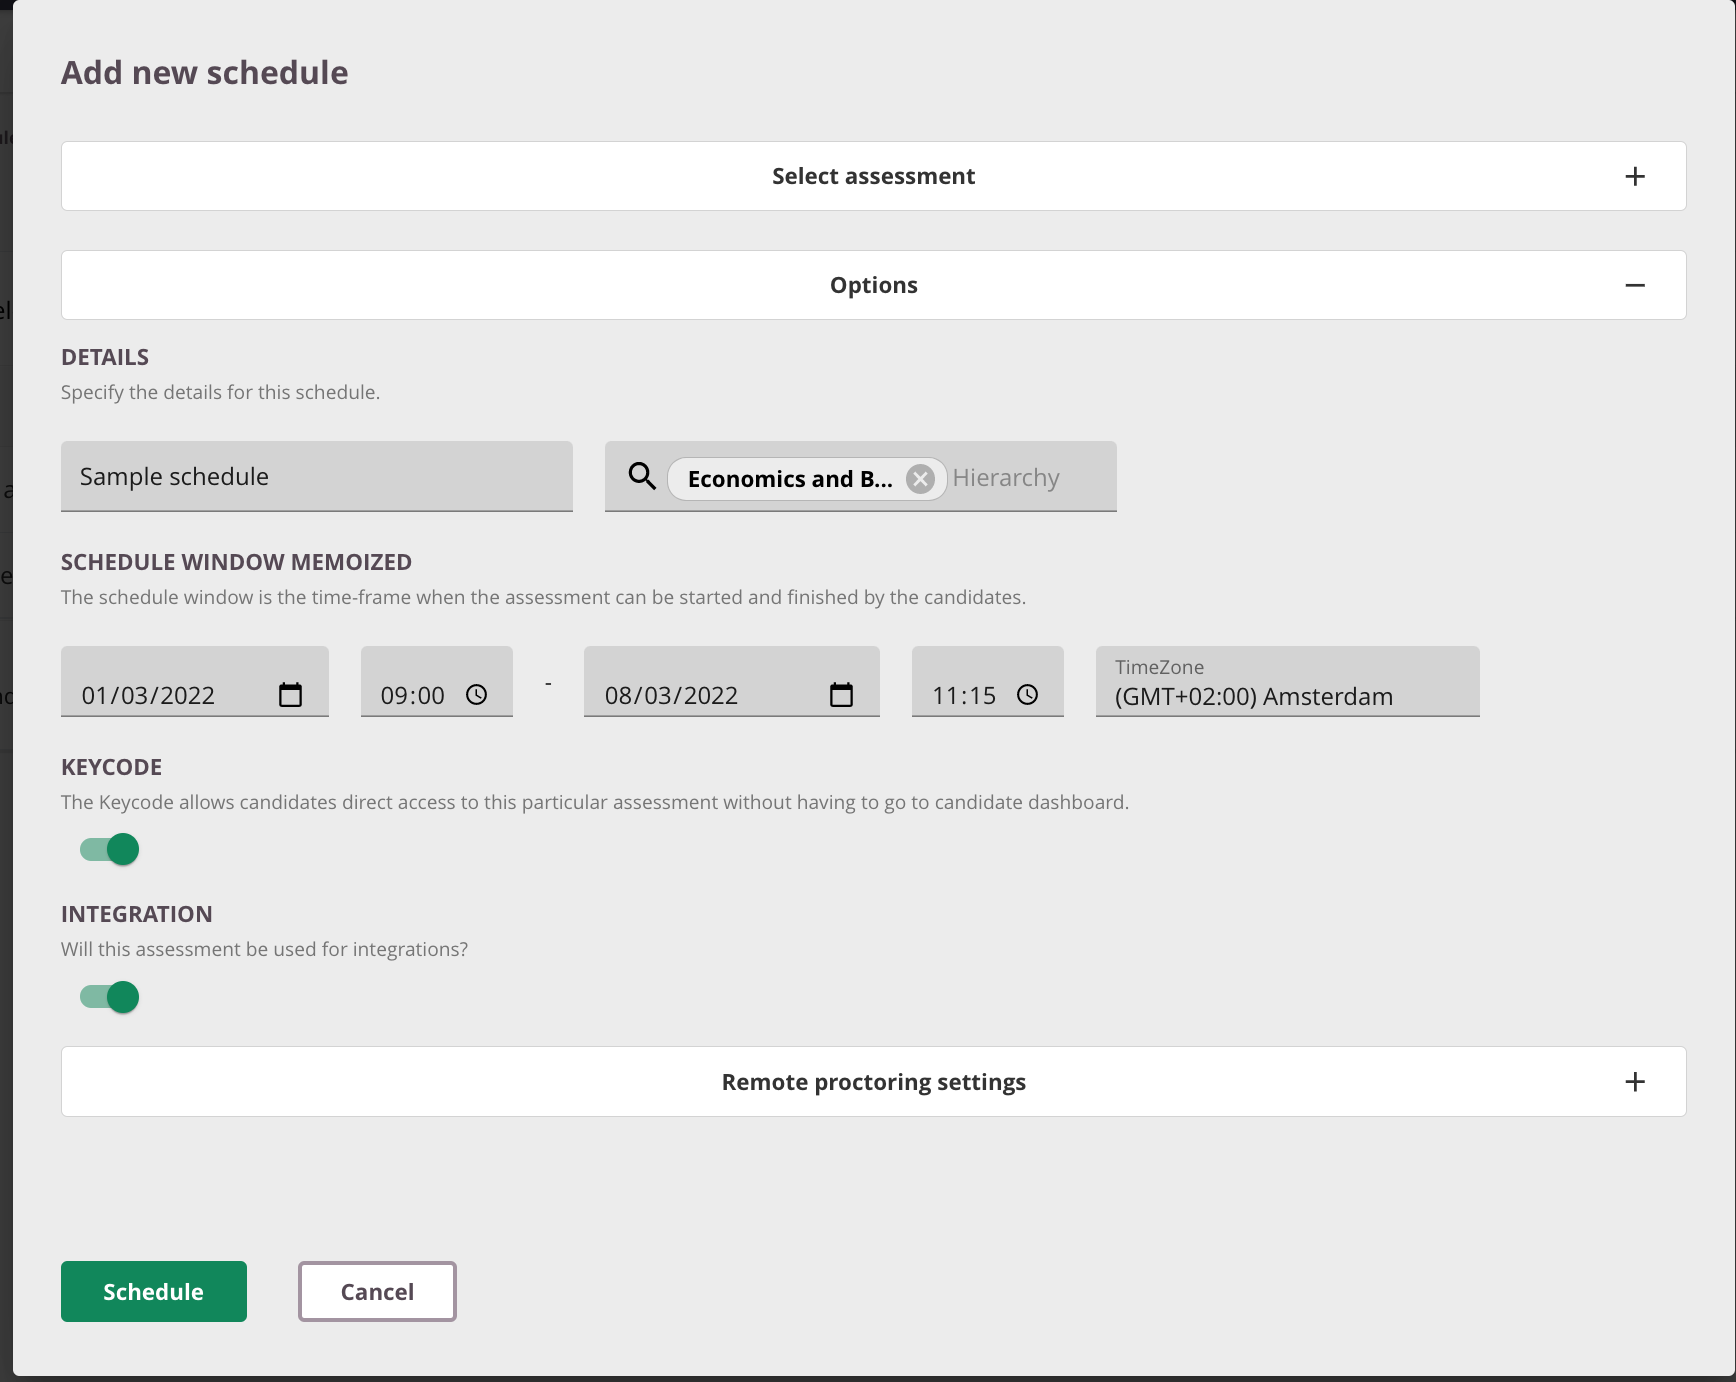
Schedule Title
Enter the schedule title. This is the title shown to candidates on the candidate dashboard.
Tip: Use a unique or descriptive title that includes timing, location, or group information. This makes it much easier to find later when marking or reviewing results.
Hierarchy
Select the hierarchy level to associate with this schedule. This determines which users with the relevant hierarchy on their profile can perform Marking Coordination or access reports for this assessment.
Schedulers only see hierarchies they have access to.
This has no effect on which candidates can take the assessment — that is configured on the Candidates tab.
Schedule window
Set the period during which candidates can start the assessment:
- Schedule opens: the start of the window during which candidates can begin the assessment.
- Schedule deadline: the end of the window. This deadline is absolute — see the tips below.
The schedule window differs from the maximum time allowed per attempt, which is the assessment duration set by the assessment author. The schedule deadline always takes precedence.
- Timezone: shows the time zone used for the schedule window. Click the link to schedule for a different time zone.
The time zone adjusts with daylight saving time. For example, Amsterdam is GMT+1 on 1 January and GMT+2 on 1 July. When selecting GMT+1 for a schedule starting on 1 January, the screen may show GMT+2 if viewed during summer time, reflecting current timezone settings.
- Keycode: Keycodes are a single-use login method that gives candidates direct access to their exam, bypassing the candidate dashboard. To use keycodes, a system administrator must first activate them in Global Settings. Once activated, keycodes are enabled by default for new schedules.
Integration — External ID (optional; may not be visible for your organisation)
The unique identifier for the schedule used in integration. This may be pre-filled if the schedule was created via your organisation's booking system integration; it can be overridden manually.
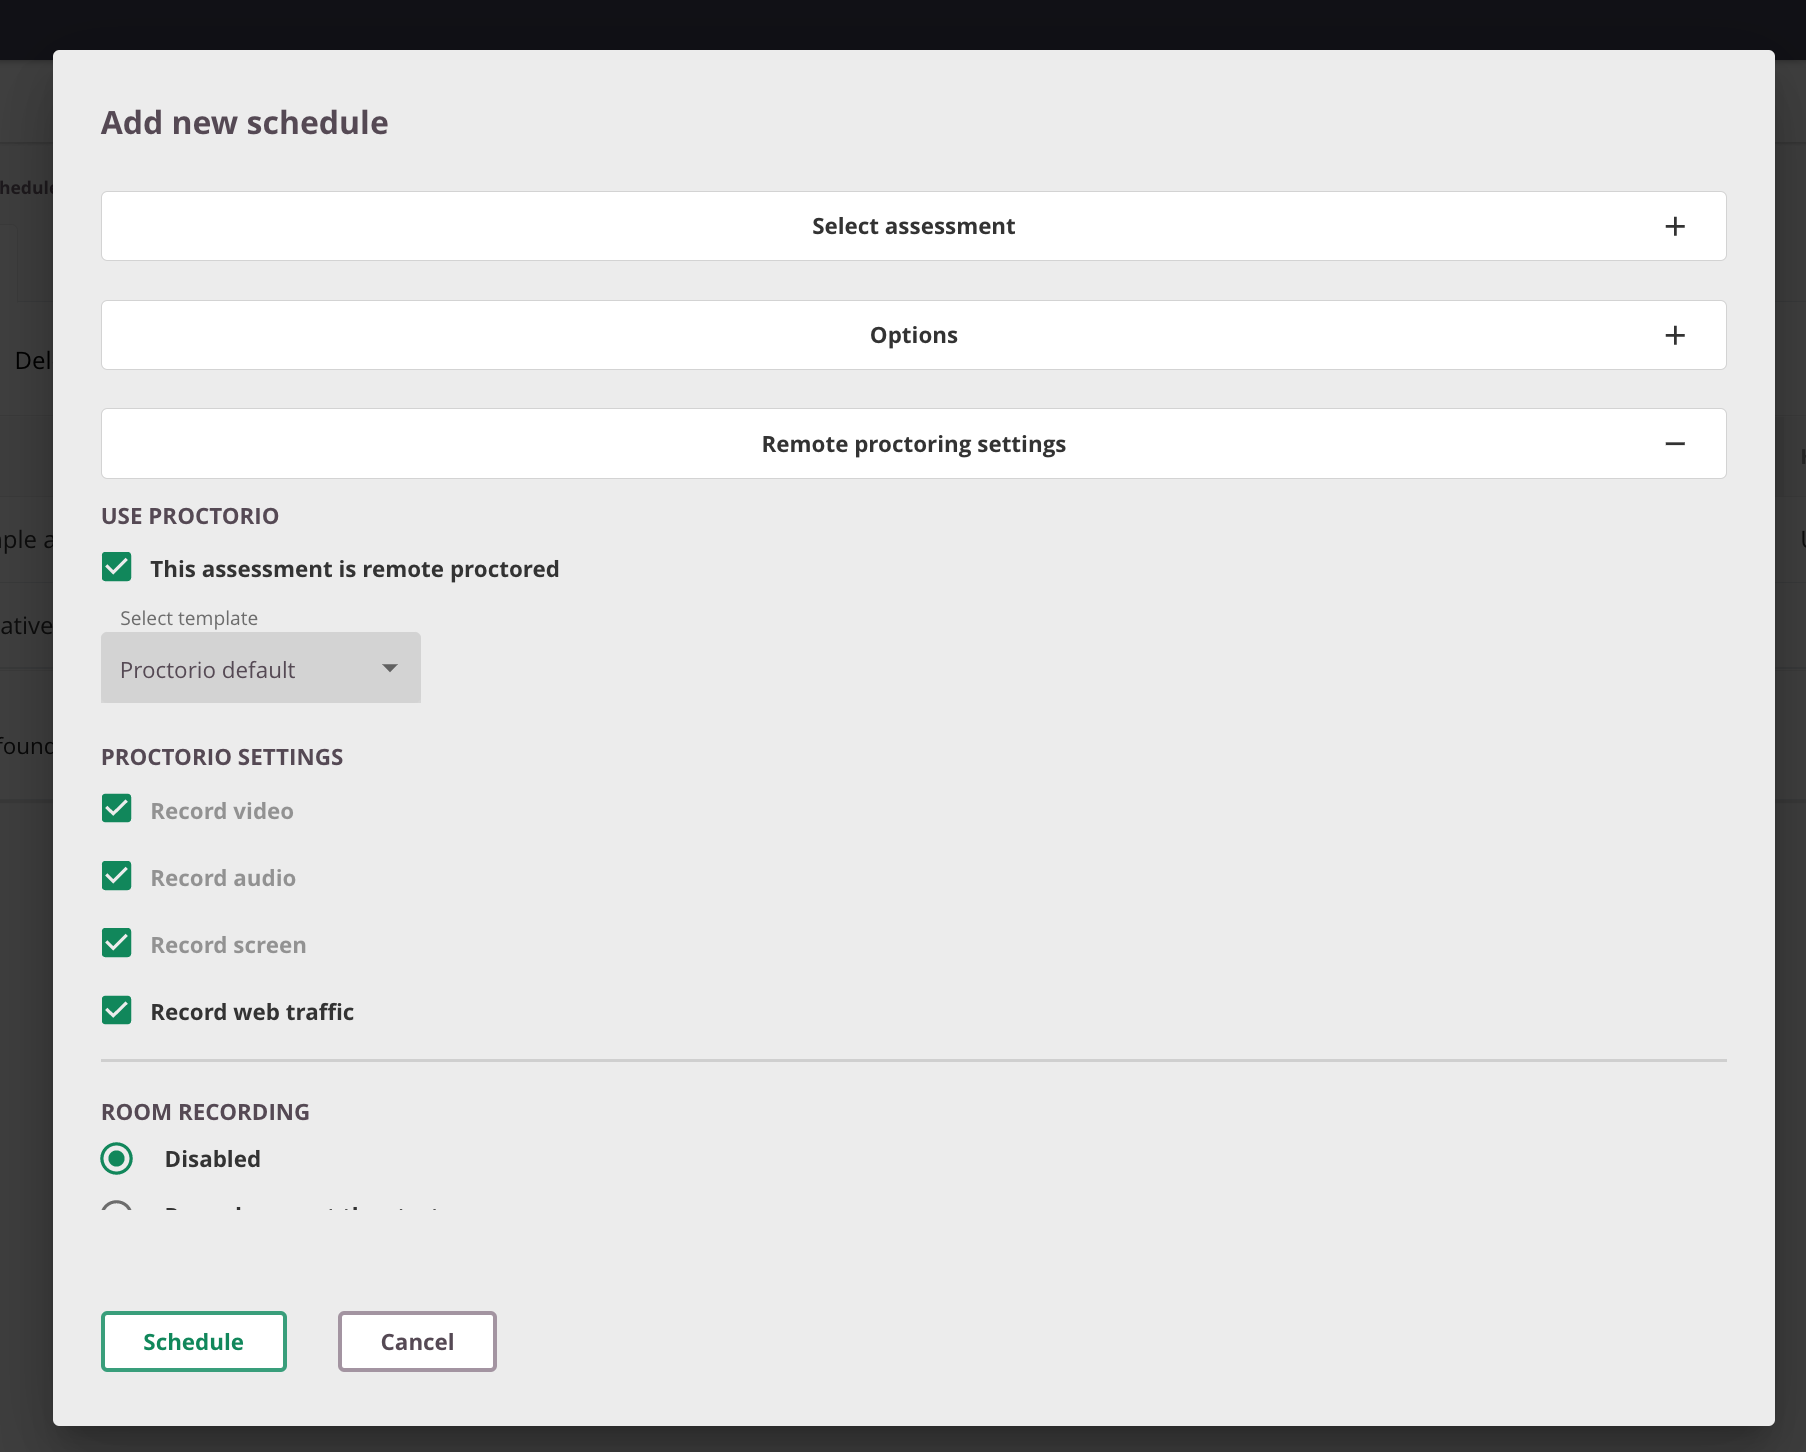
Remote proctoring settings
If the Proctorio add-on is activated, Proctorio can be enabled at schedule level by selecting a template and making any necessary adjustments.
Important tips for scheduling
- Set an extended schedule window as best practice. For example, an assessment running from 10:00 to 12:00 might be scheduled from 09:55 to 12:30. This provides flexibility if an exam needs to be paused. Consider the exam provider's procedures when applying this.
- The schedule deadline is always absolute — it cannot be changed, even by Cirrus.
- If a candidate starts a 120-minute exam 60 minutes before the schedule deadline, they will have only 60 minutes.
- If the deadline is in 70 minutes, the candidate has 60 minutes on the clock, and the invigilator grants 30 minutes extra time, the deadline still applies: the candidate will have only 70 minutes. The candidate's timer counts down to the schedule deadline.
- The maximum period between schedule open and deadline is 2 years.