
Re-marking enables your organisation to handle candidate appeals for re-evaluation. This article explains how this works.
What is remarking?
After results are published, one or more candidates may appeal. Alternatively, an error may have been found affecting an individual candidate.
If you need to re-evaluate one or a few scripts, Remarking is the feature to use.
How to select for remarking
Step 1: add role-based permission
To allow users to perform re-marking, they need the Remarking role-based permission.
- Go to Admin → Roles to activate Remarking for one or more roles.
Step 2: flag for remarking
The Remarking process begins in the Reports module. Users also need the Reports → Results role-based permission to flag results.
- On the Results screen, select one or more candidate results and click Flag for re-marking.
Results must be published before they can be flagged for re-marking.
The button is disabled if a result is Voided, Not submitted, or has the status "Remarking in progress".
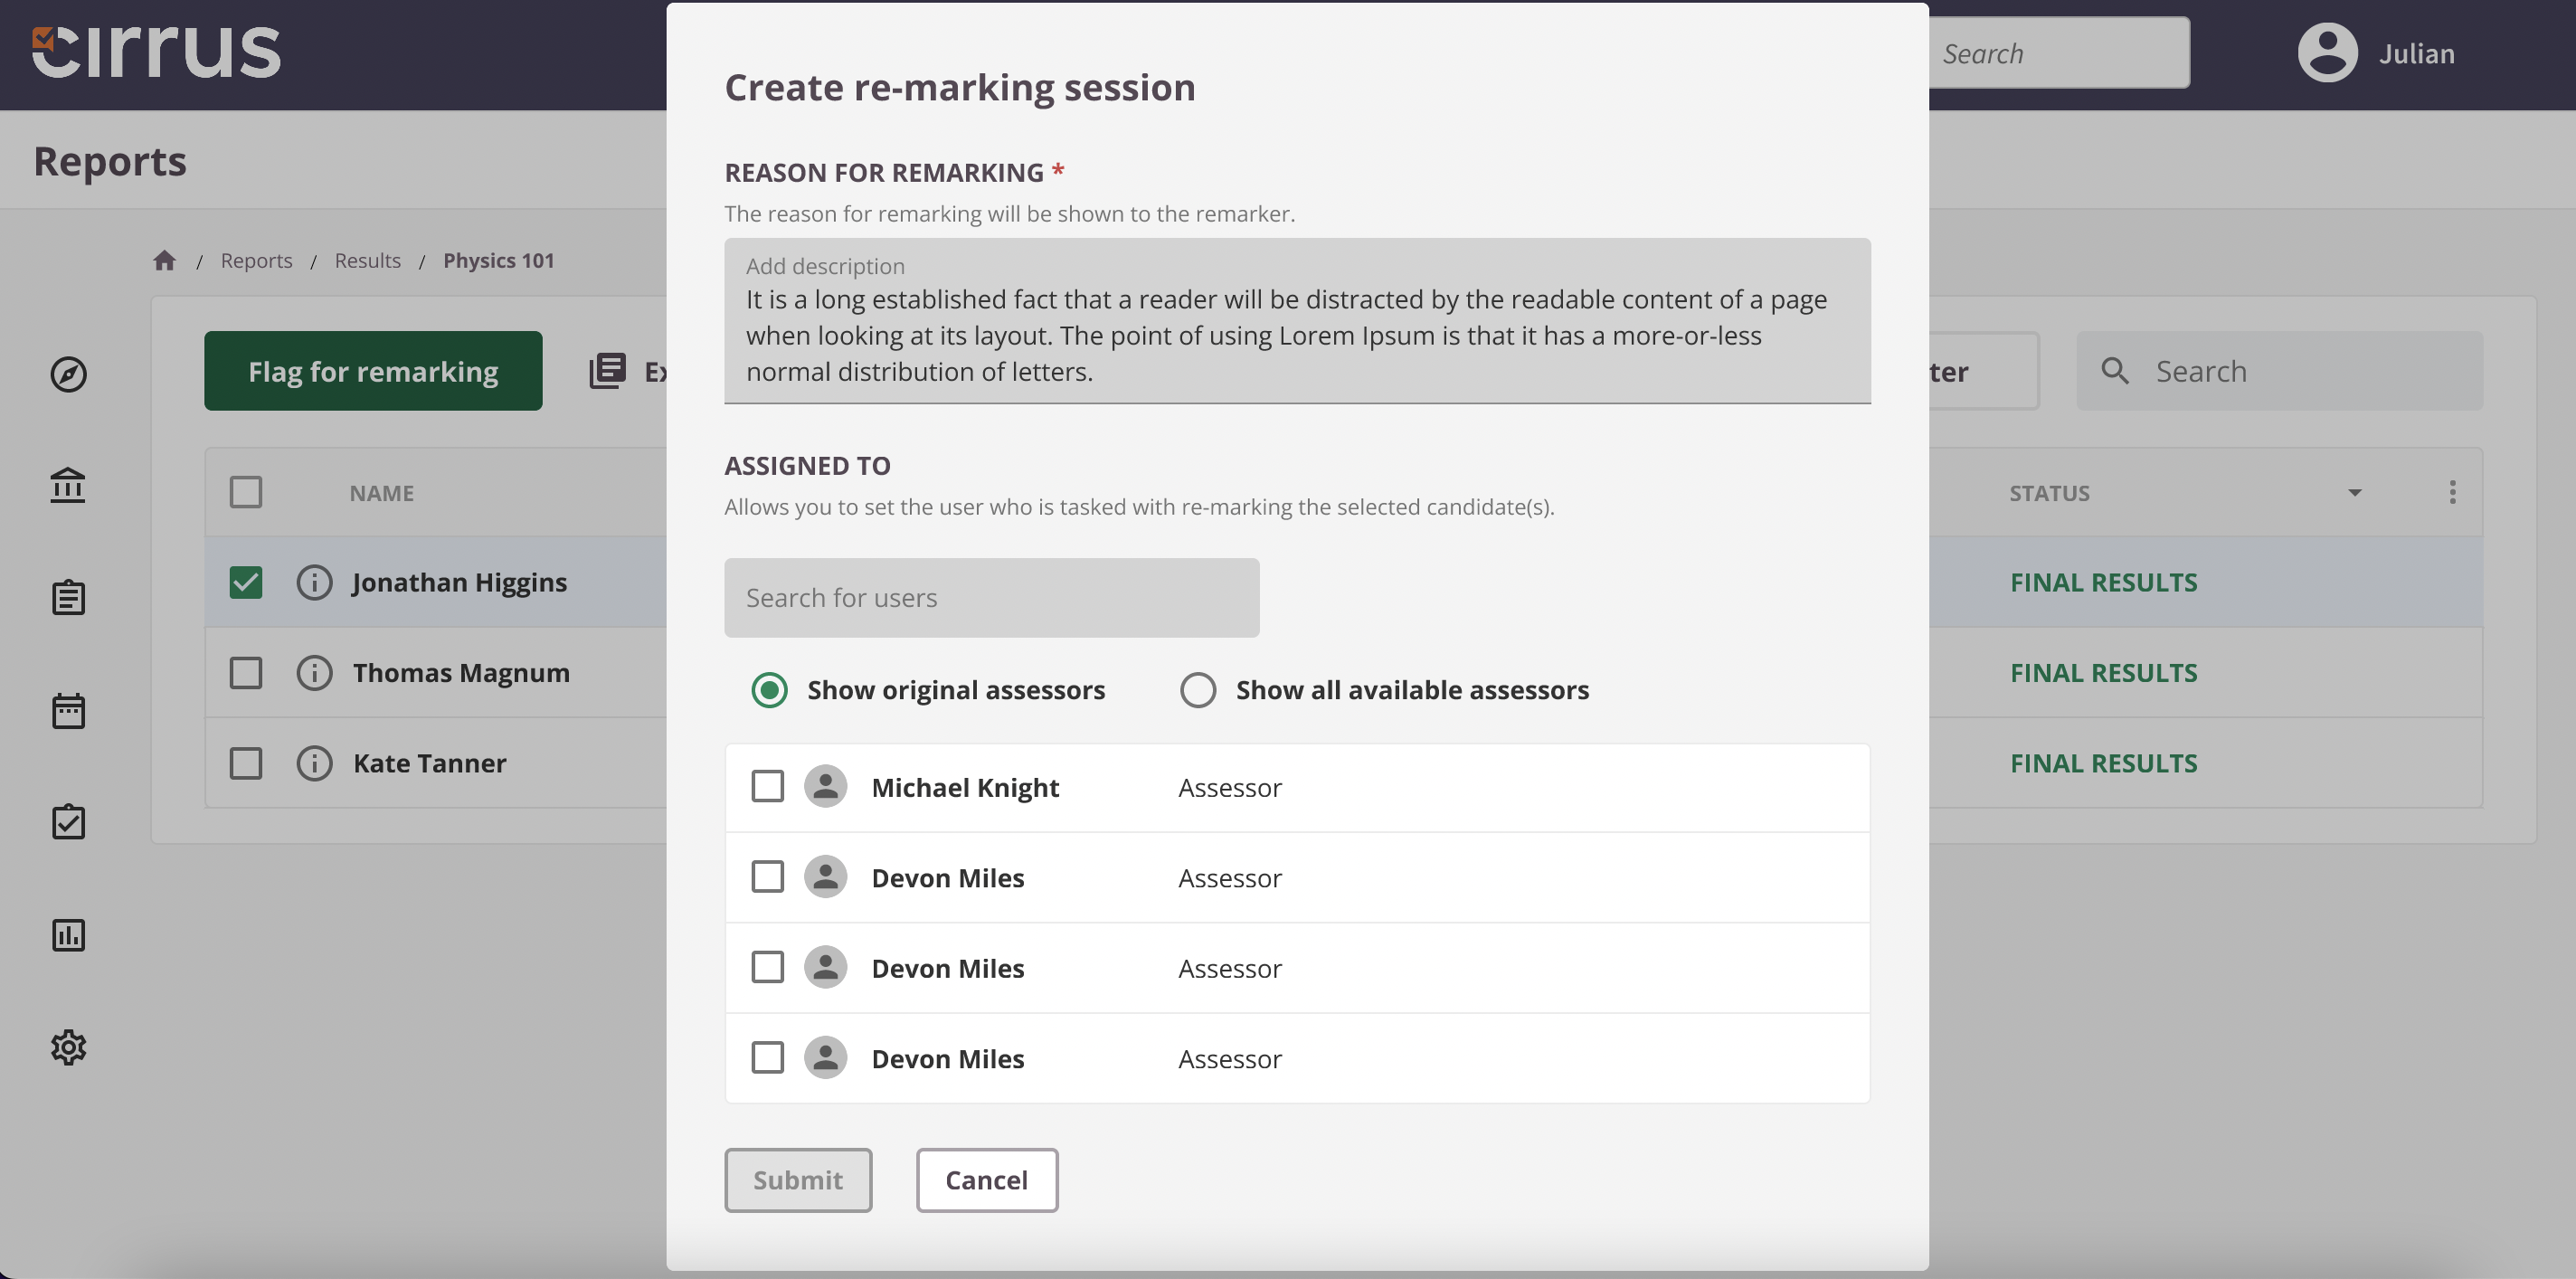
Step 3: complete the dialog window
A dialog window will appear. Complete all steps:
- Description (mandatory): Add a description to clarify the reason for re-marking. This is also visible to the selected remarker(s).
- Select assessor: Select one or more remarkers (see below).
- Original assessors: Select from the original pool of assessors who marked this script. This list includes all original markers regardless of their remarking permission.
- All available assessors: Shows all available markers with the role-based remarking permission.
After submitting, the selected assessor(s) will be able to perform re-marking on the Remarking tab in Marking. A notification will appear on their dashboard.
Repeating the process
Once Remarking is complete and results are published again, the status changes to Final results.
It is possible to flag the same candidate multiple times. There are no restrictions on the number of times a candidate can be flagged for re-marking.
How to perform remarking
Step 1: open the remarking tab
Candidates flagged for re-marking appear under the Remarking tab in Marking.
- Go to Marking → Remarking. If this tab is not visible, your role does not have access.
The Remarking table shows only schedules that have one or more candidates flagged. If no candidates have been flagged, the list will be empty.
Step 2: start remarking
Re-marking scripts is largely the same as the initial Assess process.
Key points to note:
- View by Schedules or Assessments.
- Search by Last Name, First Name, combination of first and last name, Username, UserID, email, or schedule title.
- Columns:
- Percentage: The candidate's score, updated after the re-marker submits. For example, if the candidate initially scored 50% and the re-marker adjusts some scores and submits, the percentage will update.
- Original result: The result before re-marking.
- Adjusted result: The result after re-marking (once scores are submitted).
Step 3: submit scores
Once re-marking is complete, the re-marker must submit the scores. After submission, the process moves to the final step.
Step 4: publish results
Publishing is required to return the re-marked results to the Reports module and (if applicable) the candidate dashboard.
- Users need role-based permission for the Results tab to publish results.
The assigned assessor(s) are the only people who can publish their re-marked results.