
Once a schedule has been completed by candidates, their submissions are ready for marking in the Submissions tab under Marking > Assess.
How to begin marking
- Navigate to Marking > Assess.
- Click the schedule you want to mark. The Submissions screen opens, listing all submissions.
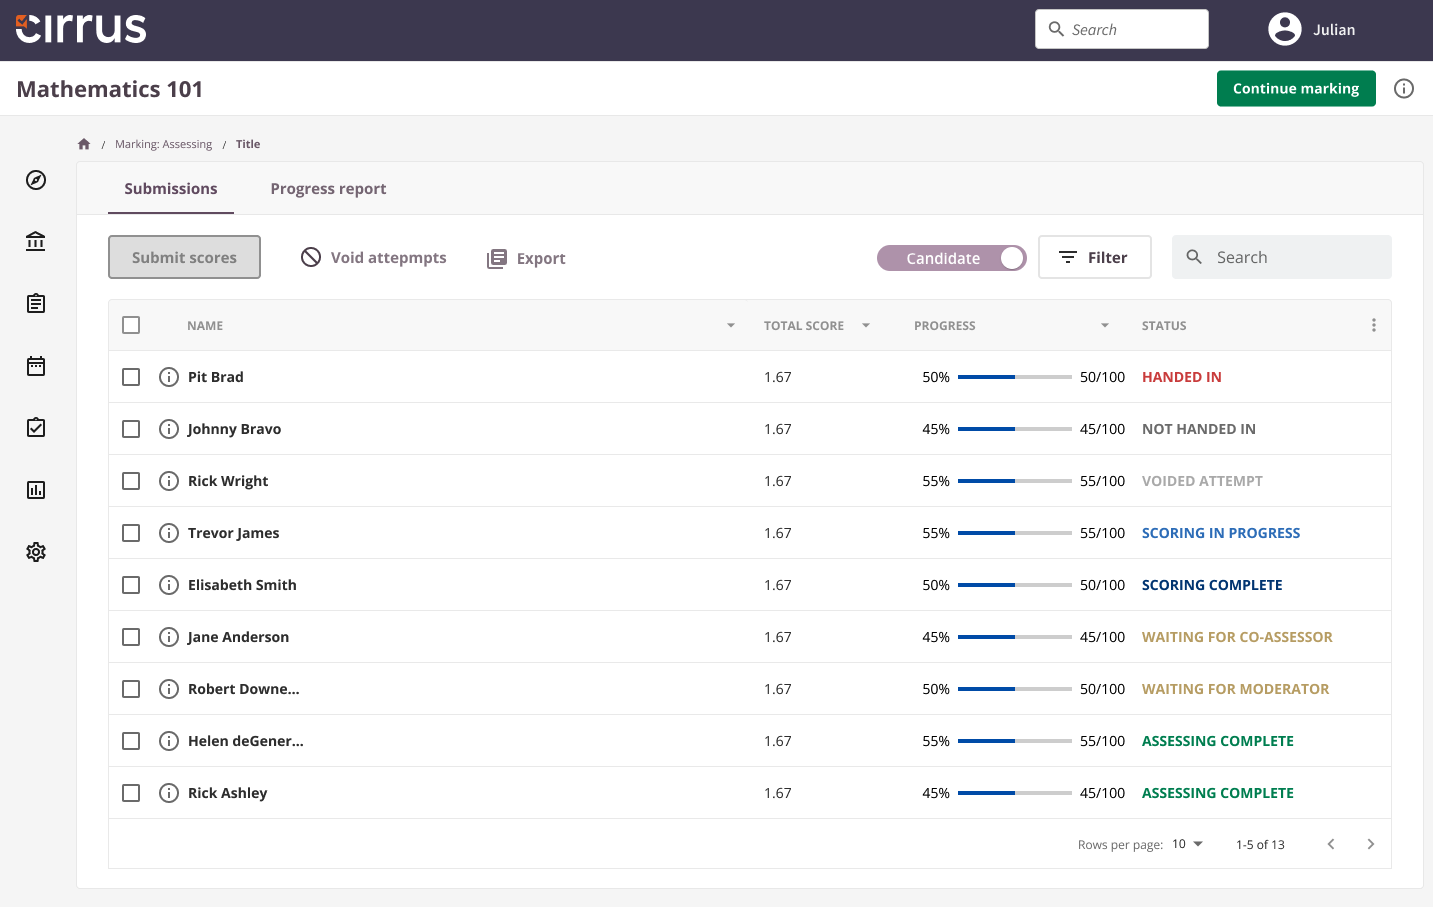
The Submissions screen includes the following:
- List of candidates/items: Displays the user, manual scoring progress, submission time, your score, moderator score (if applicable), and the scoring status.
- Candidate/item selection: Click on a candidate or item to start or continue scoring, depending on the candidate/item toggle.
- Status column: Indicates the scoring status for each submission.
- Filter options: Filter by attempts, assigned markers, and scoring status to manage a large number of submissions efficiently.
Completing the marking process
- Select the submissions you have scored using the checkbox next to each name or item.
- Click Submit scores. You will be asked to confirm, as scores cannot be changed after submission.
Scores can be submitted for individual candidates or in bulk.
Columns and filters
- Default columns: Name, Total Score, Progress, and Status. Tooltips explain the purpose of each column.
- Filter options: Filter by candidate/items, attempts, assigned markers, and status.
Bulk actions and search
- Bulk moderation: Allows moderators to agree with assessors' scores in bulk.
- Export to Excel: Exports selected submissions for analysis or reporting.
- Search: Find specific candidates or items quickly.