
Assess tab
The Assess tab is the primary dashboard for marking activities. If you are tasked with marking assessments, this is your starting point.
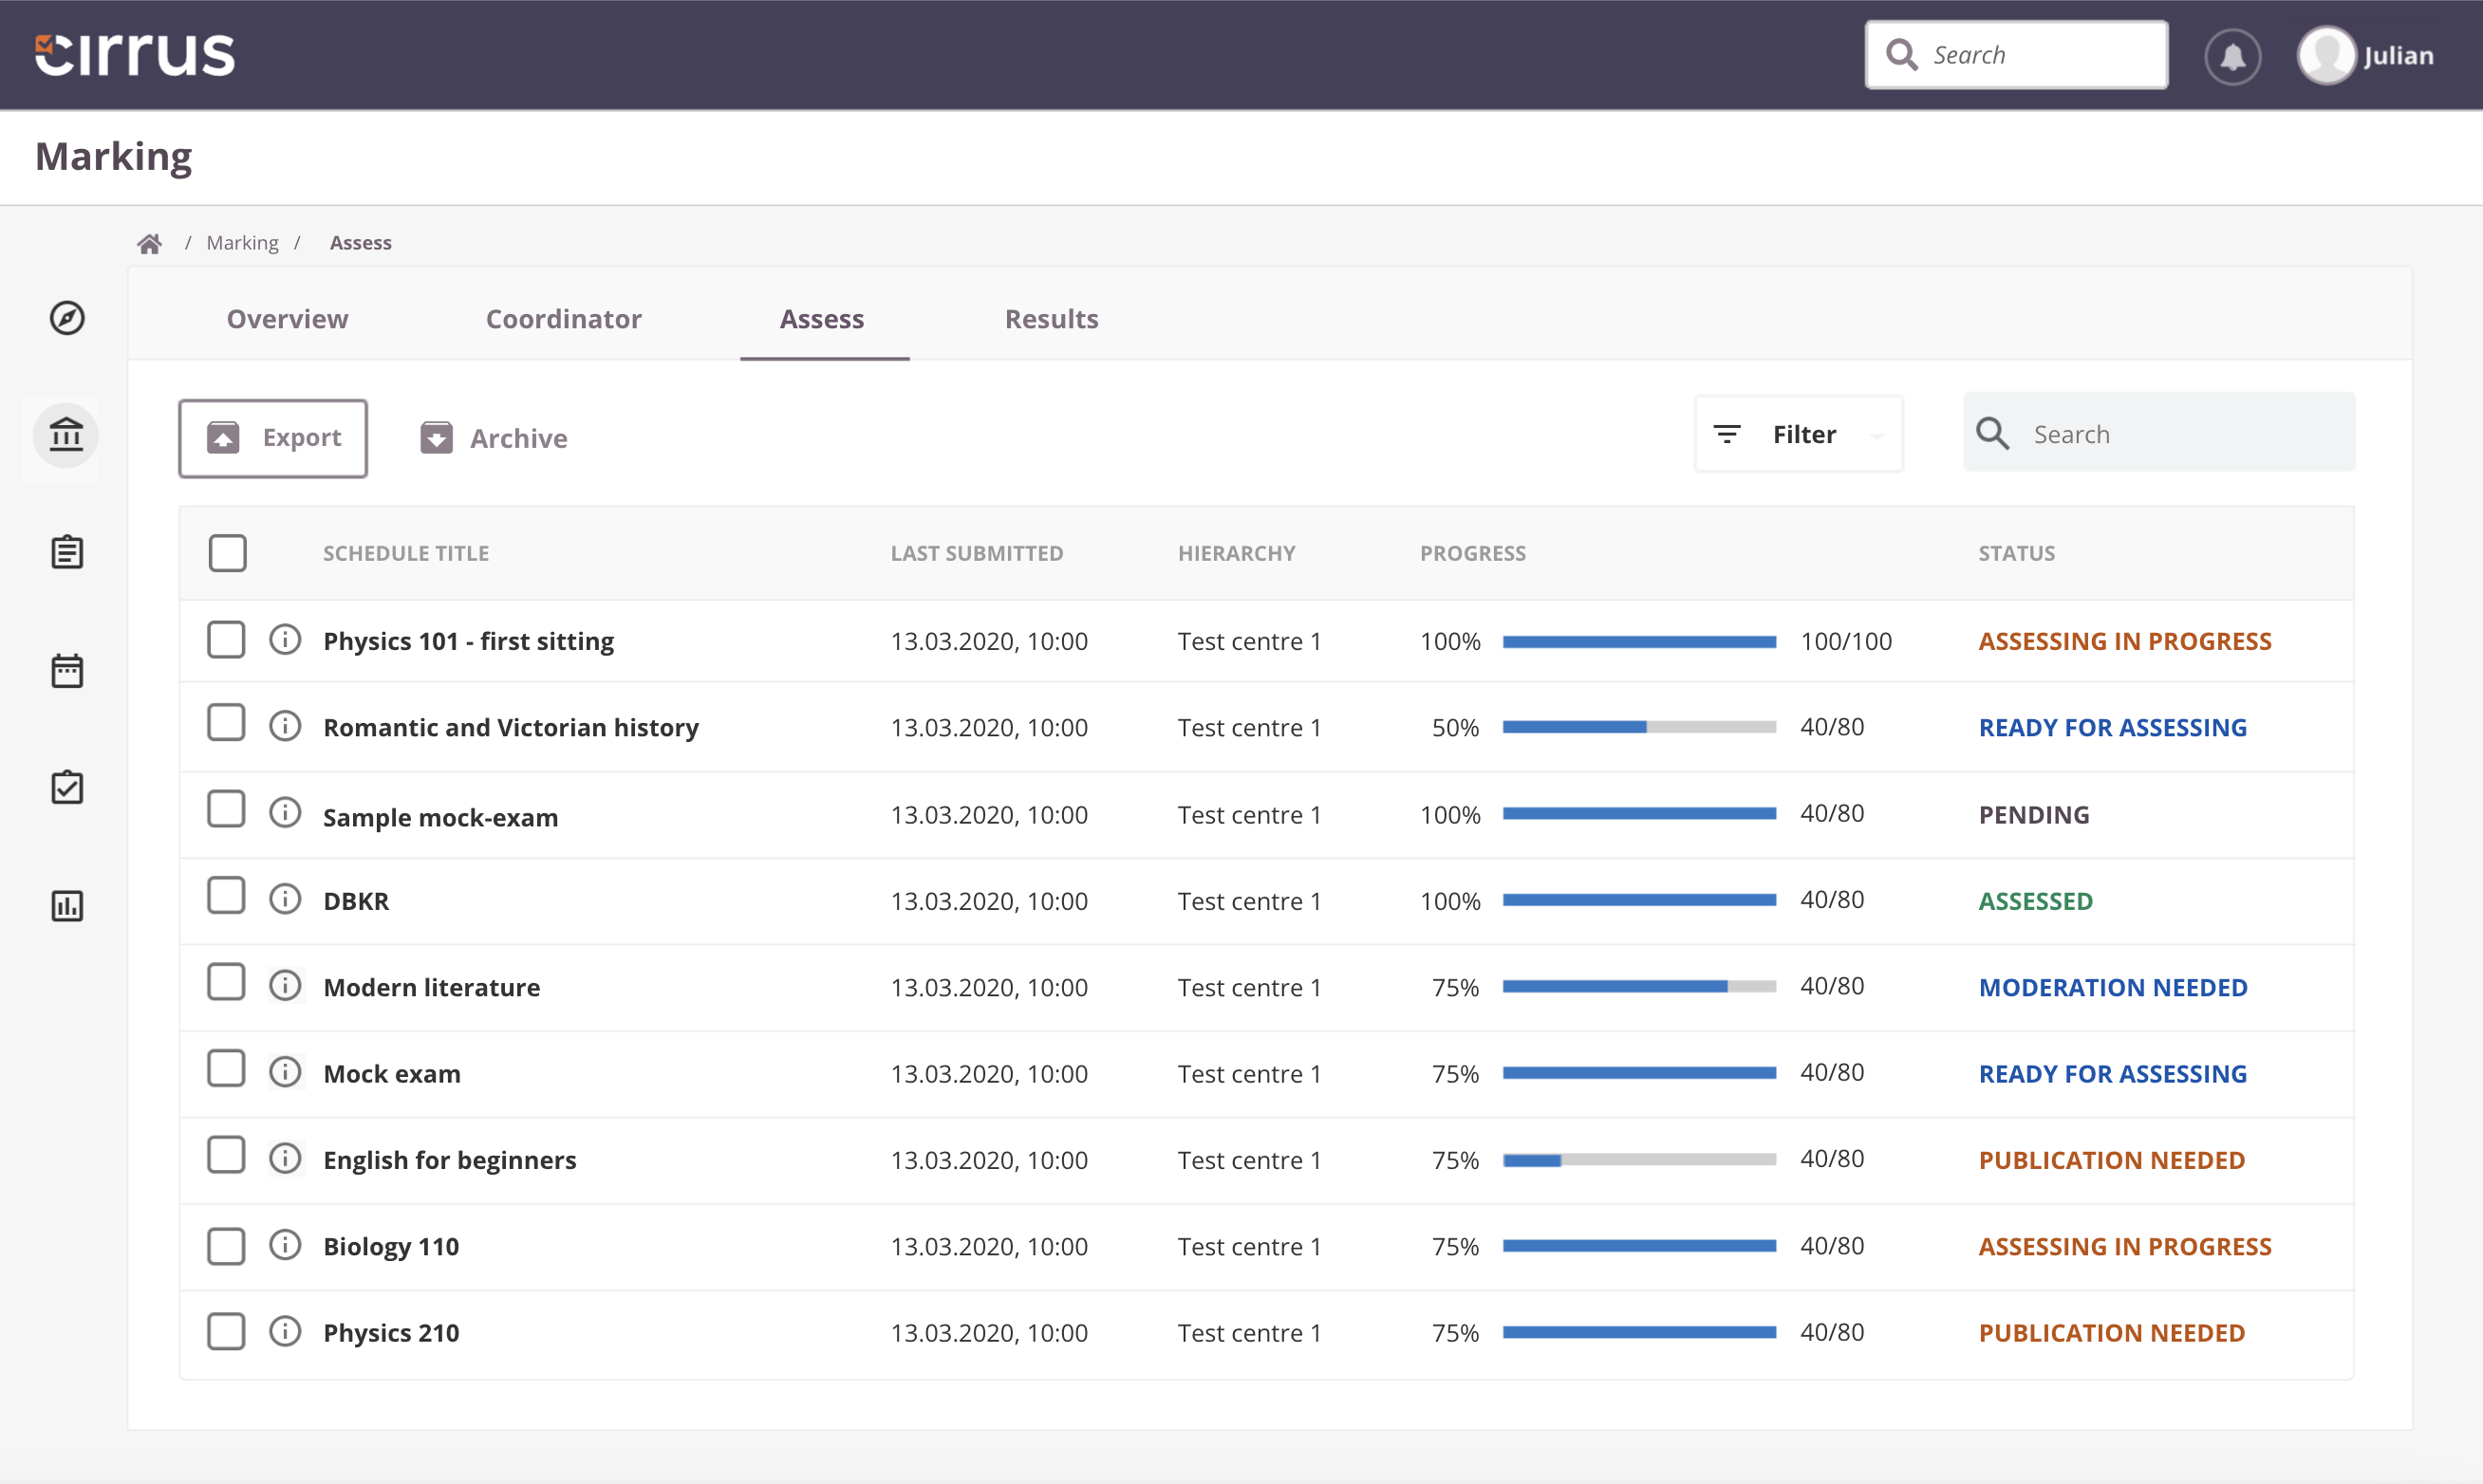
What the Assess tab shows
As a marker, the Assess tab provides a central view of:
- Schedules assigned to you for marking.
- Assessments ready for marking.
- The status of each assessment requiring your attention.
This tab is used in both the extended marking workflow and the simple workflow.
How to begin marking
-
Access the Assess tab: Navigate to Marking and click the Assess tab.
-
Review the schedule list: The list shows all schedules assigned to you as a marker or moderator. Each schedule has a status indicating its current phase:
- Pending: Candidates have not yet taken the exam; the schedule is not ready for marking.
- Ready for Assessing: Candidates have submitted their work and the schedule is ready for marking.
- Assessing in Progress: You have started marking submissions.
- Assessed: You have submitted all scores; results are awaiting publication.
- Moderation Needed: A moderator must review the marking before it is finalised.
-
Filter and select: Use the filter icon to sort assessments by status, focusing on those Ready for Assessing. Use additional filter options to narrow the overview further.
-
Begin scoring: Click on a schedule title to open it and start marking candidate submissions.
-
Search: Use the search box to locate a specific schedule by title.
Archiving
Completed schedules (fully marked, graded, and results published) are archived automatically. No action is required.
If you need to archive a schedule manually (for example, after test marking where results will not be published), click the archive button. You can unarchive a schedule at any time.
Reports
Exporting schedule data allows you to analyse or share information outside the platform. The export includes all information from the columns in the Assess tab, including hidden columns.
To export:
- Select one or more schedules.
- Click Export at the top of the table.
- A ZIP file containing an Excel file will be downloaded.