
The Test Wizard simplifies the creation and scheduling of assessments into a guided, step-by-step process. It is designed for educators and administrators who want a faster, more streamlined workflow.
Getting started
Permissions and access
To access the Test Wizard, users must have the following permissions:
Site collection roles
- Library: View collections tab.
- Assessment Roles: View assessment tab; Add assessment.
- Schedule: View schedule tab.
Collection role
Access to Items within the collection is required to launch the Test Wizard.
Launching the Test Wizard
The Test Wizard is accessed from within a collection. The Test Wizard button is located in the top right corner, next to the Share button. Clicking it starts a guided sequence for creating an assessment.

Continue or cancel the Test Wizard
Progress is automatically saved to your user profile. If you exit an unfinished Test Wizard, resume where you left off by selecting Continue Test Wizard within the collection. Progress is saved per user, so it does not interfere with other users' Test Wizards in the same collection.
To start fresh, select Cancel without saving within the Test Wizard.
How it works
The Test Wizard simplifies assessment creation into four steps:
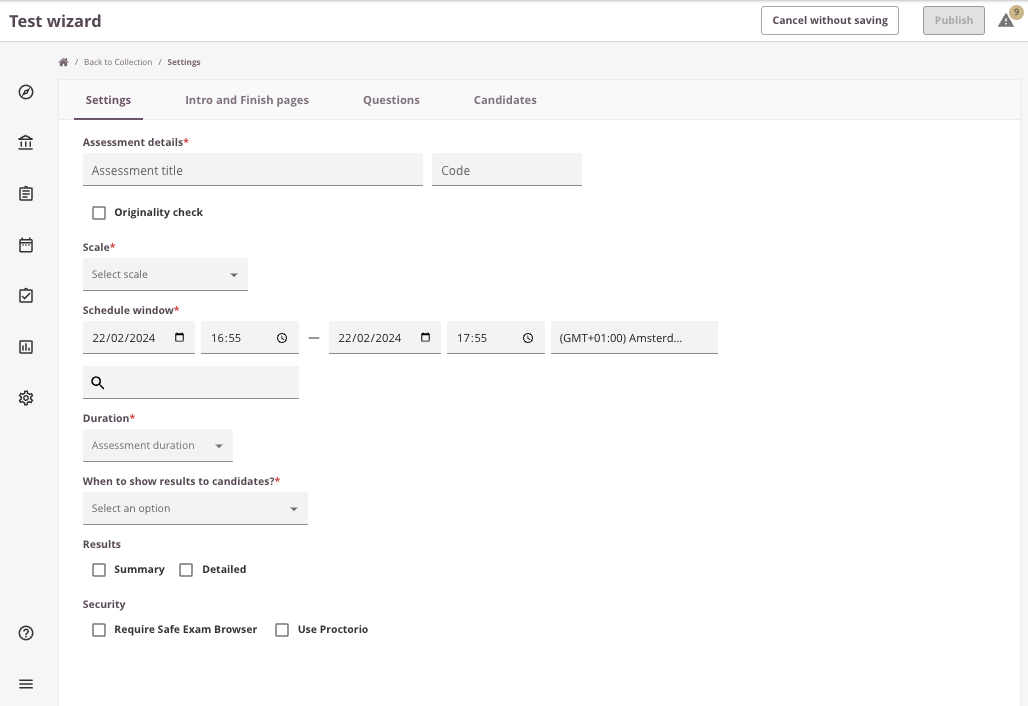
1. Settings
Choose the basic assessment options, including the title, code, and scheduling details. A minimum set of required fields must be completed to create the assessment and schedule (for example, schedule window and assessment scale).
Several options are pre-set to default values to streamline the process:
- Attempt: 1
- Score report achievement: Off
- Application usage (notepad): no notepad
- Calculator: Off
- Feedback to candidates: no feedback
- Navigation: free navigation On
- Display questions in random order: Off
- Shuffle the order of the forms: Off
- Allow candidates to give feedback: Off
- Show score per question: Off
- Use PIN: Off
- Do not display options during scheduling: Off
- If assessment contains only auto-scored questions: Marking workflow = Auto-scored
- If assessment contains one or more human-marked questions: Marking workflow = Scheduler is assessor (simple workflow)
- Schedule title: same as assessment title
- Use keycode: Off, or On if enabled by default in Admin
- Integration: Off
To modify these settings after completing the Test Wizard:
2. Intro and finish pages
Customise the welcome and conclusion pages for the assessment. The Test Wizard displays only pages from the same collection.
3. Questions
Select questions from the collection. By default, all questions from the selected collection are displayed. Select the desired questions and click Include items.
4. Candidates
Add candidates to the schedule.
Key features
- Simplified creation and scheduling: Combines assessment options and scheduling details in one process, reducing the time and effort involved.
- Direct access from collections: Launch the Test Wizard from within a collection to reduce navigation.
- Flexibility: Changes can be saved as drafts and resumed at any time. Published assessments and schedules can also be modified after completion.
If scheduling is typically handled through integration, the Test Wizard may not be the most suitable tool.
Saving and publishing
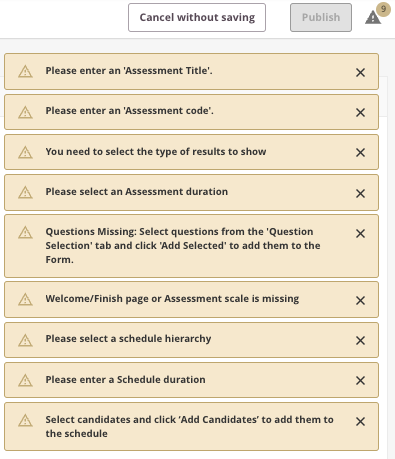
On completing the setup, choose to publish immediately or save as a draft. The Publish button becomes active once all required fields are completed; a warning icon appears for any missing information.
Publishing through the Test Wizard immediately creates and activates the assessment and schedule, making them visible in the overview. The assessment and schedule can then be managed as usual.