
Many of our customers choose the Cirrus platform for their e-Assessment delivery over multiple timezones. This article deals with some important settings which determine the default language, timezone, time format and standards and formats for your environment and its users.
Admin > regional settings
The default language for your environment (both authoring and delivery) can be changed via Admin > Regional settings:

- Go to Admin > Regional settings to determine the default settings for your environment on:
- Language - you can choose between US English, UK English, Dutch or German currently.
- Region and Timezone - select a region and choose a default time zone from that region
- Standards and formats - you can choose between US or UK English or Dutch currently. This affects the way dates, currency and numbers (decimal dividers) are presented and entered. See for example the Numeric question decimal marker.
- Time format - you can choose between 12 or 24 hrs time formatting.
Please note: These Regional settings also define the default settings for newly created users (manually or via Excel import. When you change the 'regional settings', the changes will be applied to newly created/imported users but not your existing users.
Existing users will have their initial regional settings inherited from the regional settings at the time of creation of their account. If you want to change this, the user should do this manually in their own profile in authoring.
Admins cannot see or change timezone or format settings for individual users currently. Mail servicedesk@cirrusassessment.com if you have any question on this.
Backend: users can override / change their own regional settings via 'My profile'
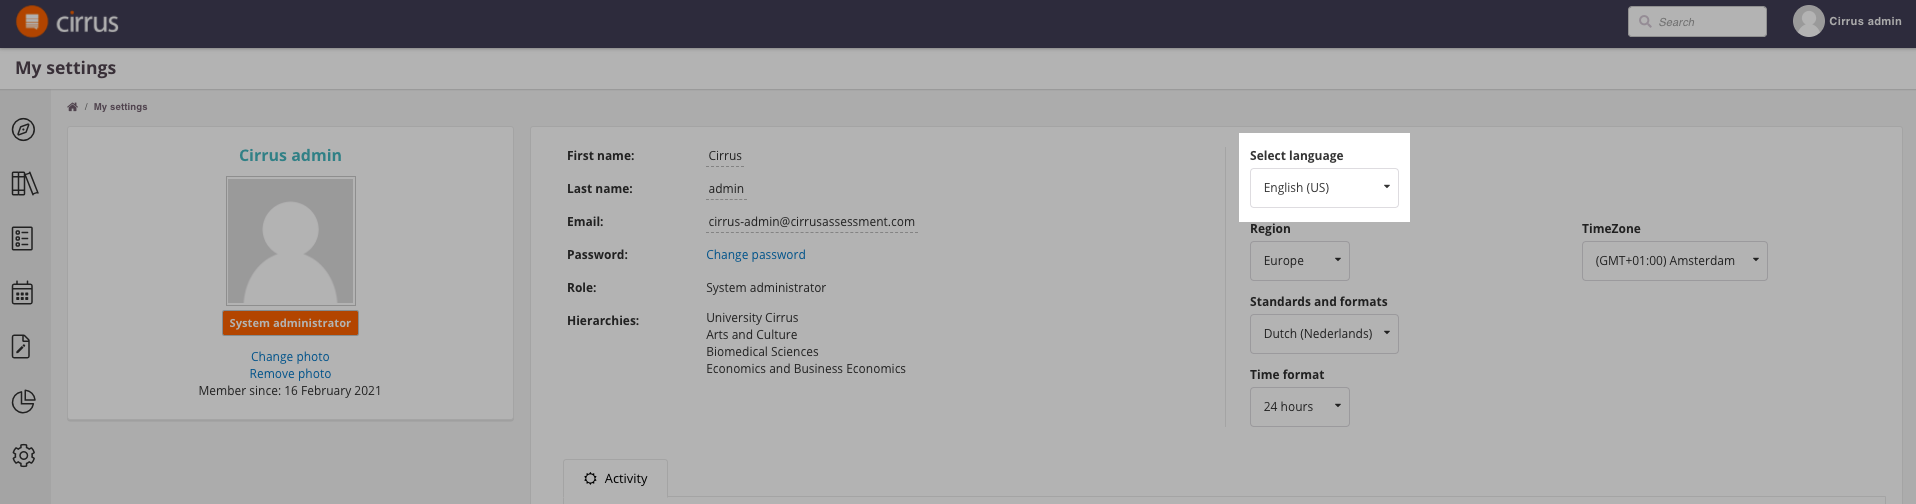
In our backend (under /authoring) your Authors, Scheduler, Admins and other users can change their personal regional settings:
.png)
- Click on your name / the dropdown in the top right of your screen after you have logged in
- Select 'My settings' and you will be able to change your language settings, timezone and format and standards and formats as an author. (Candidates cannot do this - they use the setting they chose when they log in.)
| UK english: invigilation / invigilator versus US english: proctoring / proctor Please note: The most notable change when choosing between US English and UK English as a language setting is visible on the Delivery > Invigilation tab. In US English this is the Delivery > Proctoring tab! - Invigilation / Invigilator is British English, Proctoring / Proctor is American English. |
Authoring: language selection on the login screen is for the login screen only
On the login screen for the authoring environment, users can select a language. This influences on only the language shown on the login screen. Once logged in, the language is taken from the user's profile settings.
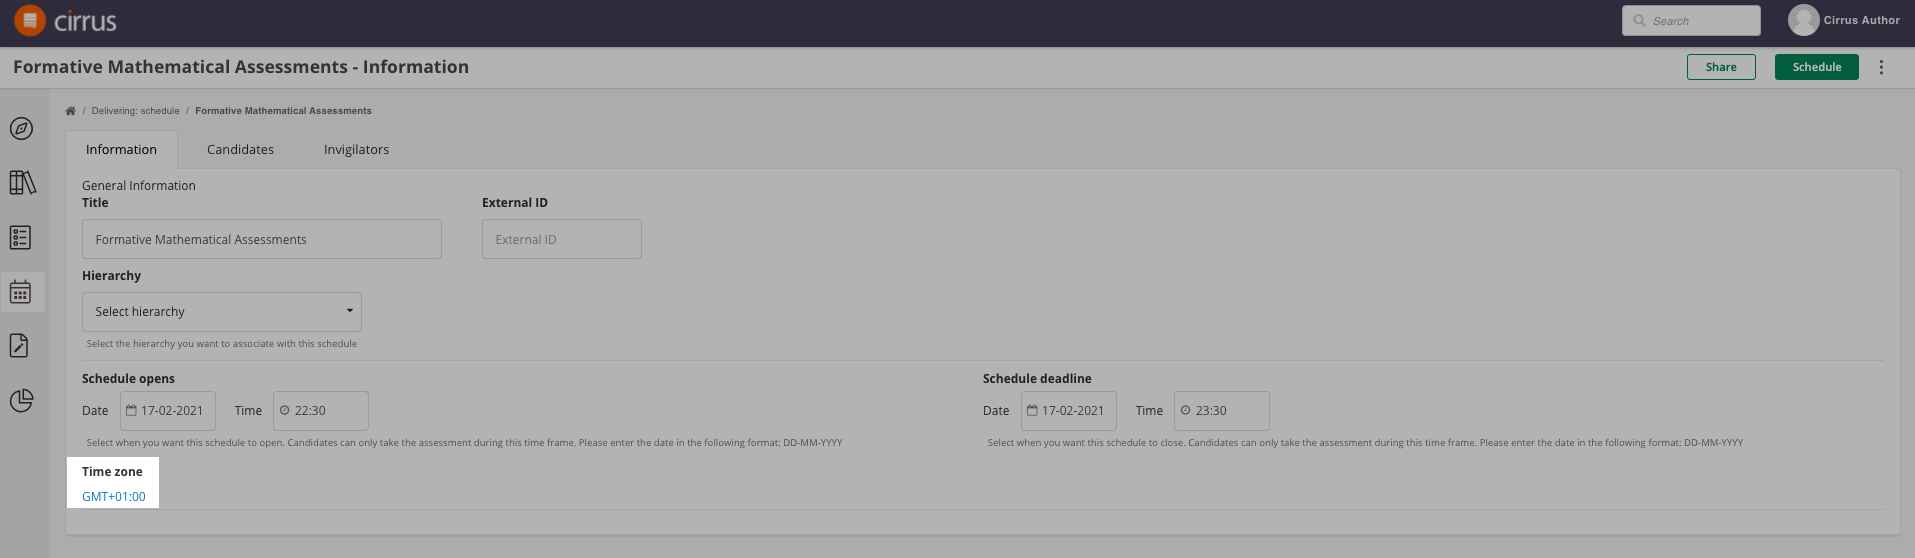
Scheduling and timezone, time format and standards and formats
A schedule is set by the scheduler for a certain time zone. It is up to the scheduler to do this correctly - i.e. use the time zone of the delivery centre. The initial time zone for the schedule is set based on the scheduler's regional settings:
Tip: If candidates are spread amongst multiple time zones:
- Schedule per timezone.
- Allow for a wide enough window for the assessment to be available across the time zones involved
- Clearly communicate the timezone used for scheduling so candidates can convert to their own time zone using for example https://www.timeanddate.com/worldclock/converter.html.
Delivery: candidates language, timezone and format settings
The language on login screen in delivery influences both the language shown on the login screen and the whole delivery module for candidate except the question texts. The initial language shown is based on the candidates profile.
Candidates do not have the option to change their own regional settings, nor is there an option to enable this via Roles > Admin > Roles > Site.