Quick Start: add new Assessment
- 07 Apr 2025
- 2 Minutes to read
- Contributors

- Print
- DarkLight
- PDF
Quick Start: add new Assessment
- Updated on 07 Apr 2025
- 2 Minutes to read
- Contributors
- Print
- DarkLight
- PDF
Article summary
Did you find this summary helpful?
Thank you for your feedback!
Do you want to create an assessment in Cirrus?
You will understand the process of creating exams fast by following this quick guide and start right away!
First thing first,
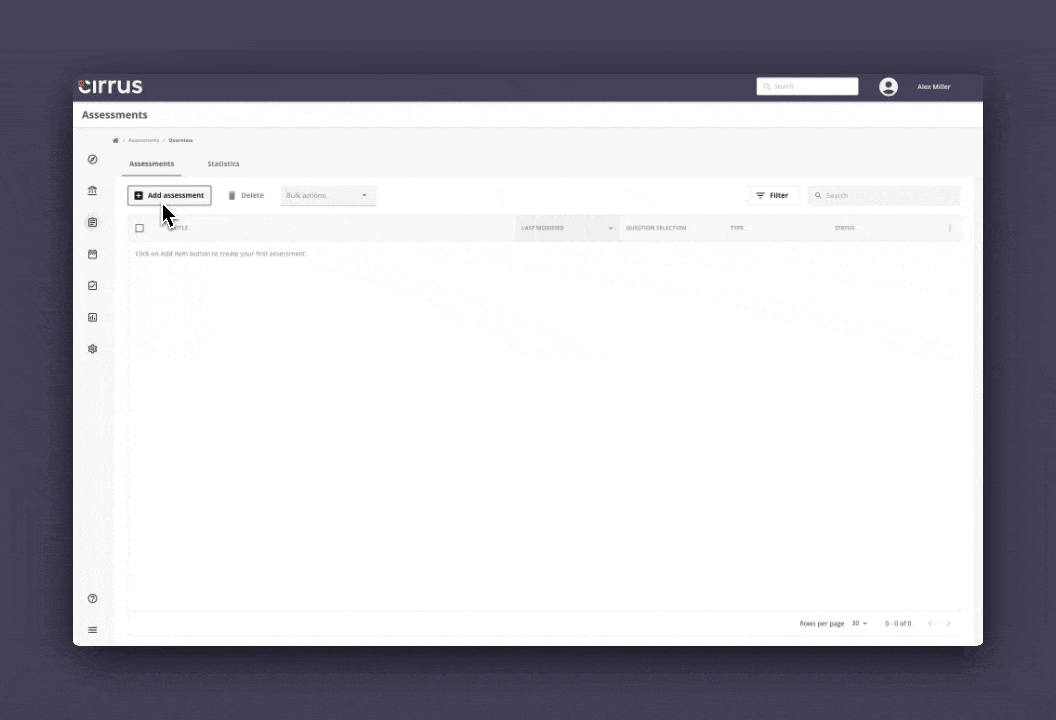
- Go to Assessments in the main menu
- This will bring you to the Assessment overview page
- Click on '+Add assessment'. This will open a dialog window to apply some basic settings for your assessment.
Assessment settings
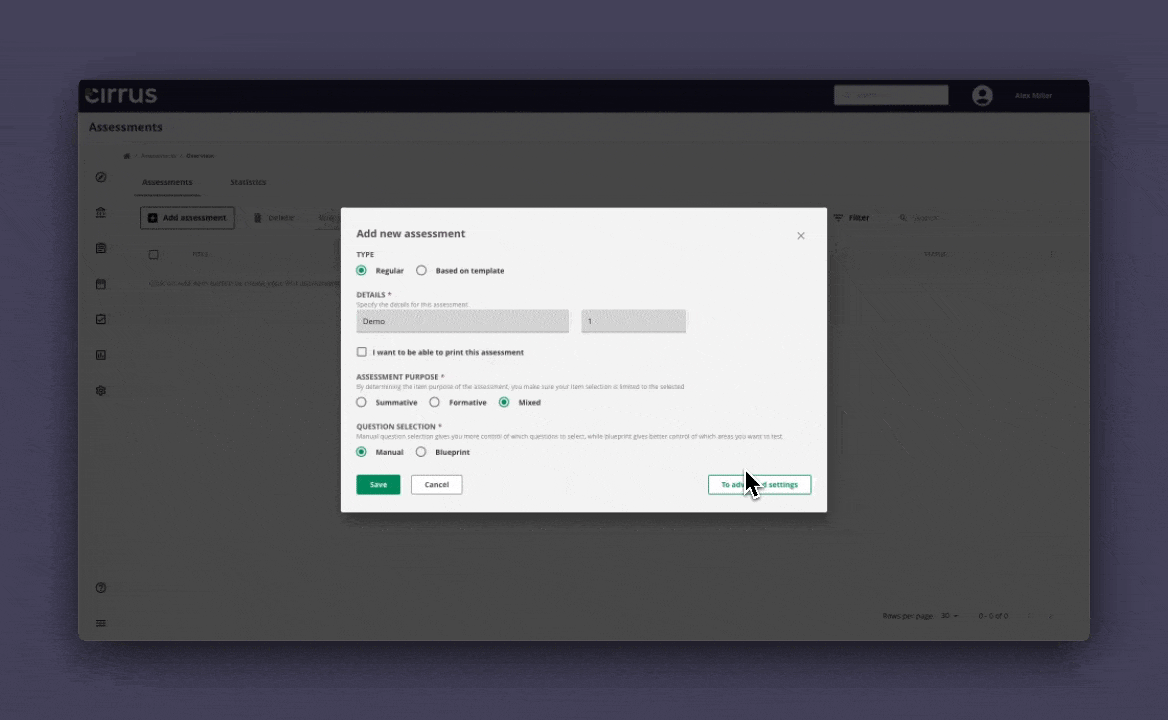
- Create a new assessment or use a template (assessment created before) to start
- Enter a key title and code (numeric and/or alphanumeric)
- Choose Formative, Summative or Mixed
- Choose 'Manual question selection' if you want to select questions yourself, or choose 'Blueprint' to let the system pull questions for you based on learning objectives/taxonomy
- Click on 'Save' and you will arrive at the overview page of this new assessment
- Or continue with advanced settings
Advanced settings
- Click on 'To advanced settings'
- 'Set time span' for this assessment, or choose 'Always' to make it available to be scheduled always
- Hit the 'Integration' slider to get an External ID to link this Assessment with your integration (optional)
- Choose a hierarchy so the colleagues of this hierarchy group can schedule this test too (optional)
- Happy with your set up? Hit 'Save' and you will arrive at the overview page of this new assessment
Adjusting assessment settings
You can always adjust these settings.
- Click on the 3 vertical dots on the top right of the overview page
- Select 'Settings'
- A dialog window will open for you to edit the settings
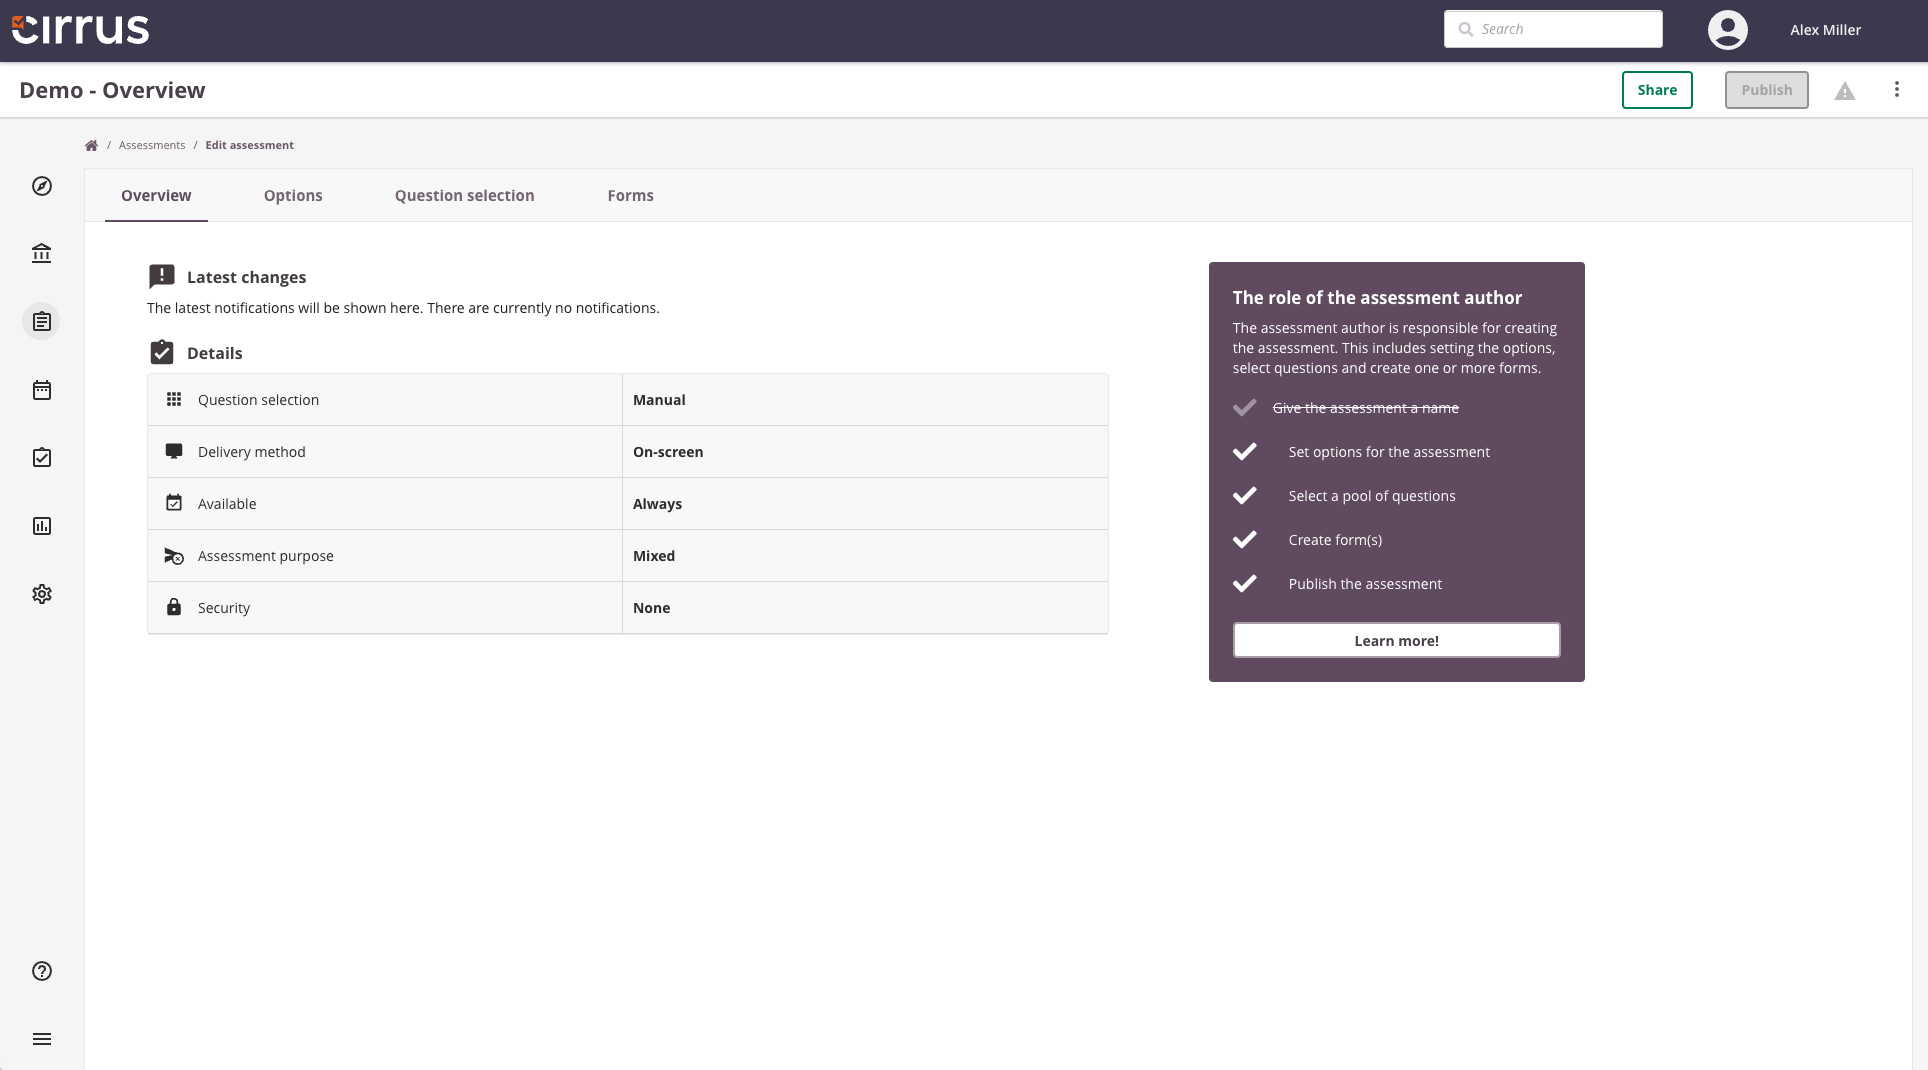
Assessment dashboard
Next, you will arrive at the Assessment Dashboard.
Overview
The overview shows the most important setting details that you entered when creating the assessment.
Options
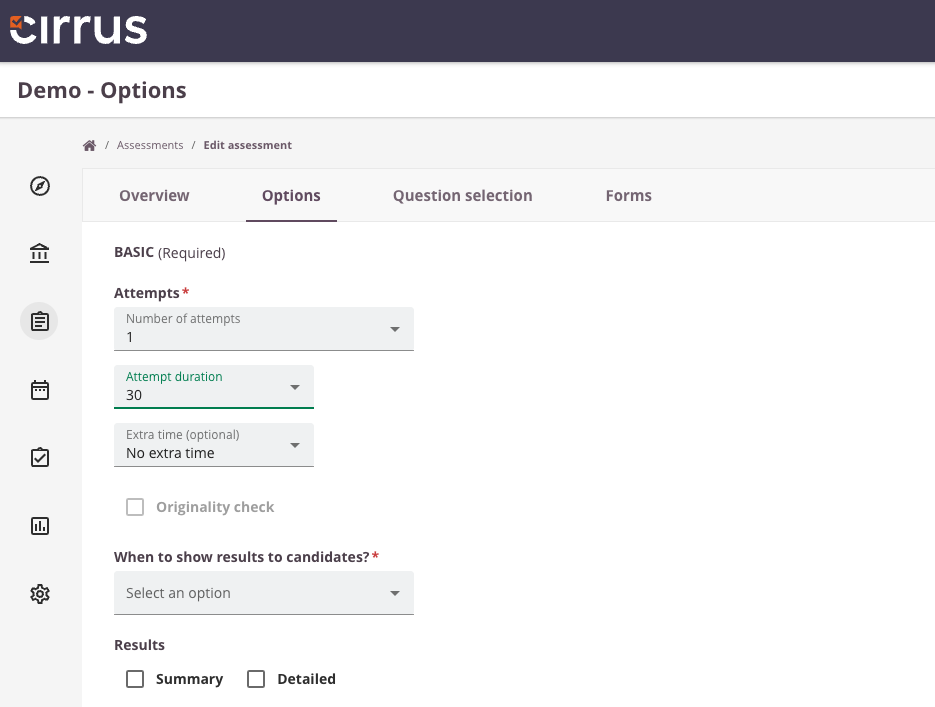
- Go to the 'Options' tab to set up your assessment
- Go here for more information about all options
- Set at least the following:
a. Number of attempts
b. Attempt duration
c. Extra time (for eligible candidates)(optional)
d. When to show results to candidates - Go to the next step: 'Question selection'
Questions selection
- The 'Question selection' tab lists all the items that you have created/shared with you
- Use the filter button to find specific questions if needed
- Select the questions you want to use in this assessment and click on 'Include tems'
- The questions are now selected for the next step: 'Forms'
Blueprint
- If you choose Blueprint, you can compose a test on the 'Question selection' tab based on 'Topics' (simple template) or 'Learning objectives and Taxonomies' (extended template)
- After setting up your blueprint matrix, you can move to the next step: 'Forms'
Forms
- Go to the 'Forms' tab, click on '+Add form' to compose the assessment (Read more about Forms here)
- Choose how many questions from the question selection you want to use in the actual assessment
- Also determine which test type you want: Fixed or Random
- Add at least a 'Welcome' and a 'Finish' page in the 'Intro and Finish pages'
- View the questions and drag them into the right order if needed
- Click on the 'Scale', choose an assessment scale and save your choice
Publish your assessment
- Go to the 'Overview' tab and see if all the necessary steps are checked
- Complete the last step 'Publish' to make the assessment available for scheduling
- Choose 'Scheduler is assessor' if the test scheduler will also be the marker. Choose 'Coordinator assign assessors' if a coordinator will setup a workflow with multiple assessors and moderators
- Change the status to 'Live' and publish the assessment
- Now it's ready to be scheduled!
Was this article helpful?