

Overview: the scoring panel
This article provides detailed information about the scoring panel in Cirrus platform, including how to use both the simple scoring and criteria-based scoring methods. Additionally, it covers various features available to markers, such as annotation tools, score editing, and feedback options.
Scoring is the most critical task for a marker, but our platform also offers several helpful tools to enhance the marking process. These tools include annotation capabilities, the ability to edit scores, and options for providing detailed feedback.
Scoring
The most important step in the scoring page is about scoring.
The scoring panel will either show a base score input or scoring based on criteria, depending on whether criteria are set up for this item in the library.
Base scoring
The slider allows the user to slide to the desired score, or the input box can be used to set the score. The slider will adjust to the maximum score. As a marker, you can use scoring with 2 decimals. The colour of the Total score background is dependent on the score:
- No points (Red)
- Partial points (Teal)
- Full score (Green)

Scoring using criteria
Scoring using criteria can only be used on the question types 'Essay' & 'File response'. It is an optional feature you can set up within the question in the library itself.
We recommend this as it aligns the different markers more effectively and provides clearer marking guidelines. Criteria scoring can be used together with a marking scheme.
As with simple scoring, a slider is available to give scores. The sum of all scored criteria/sub-criteria is added to the total number of points for the question. This field is not editable when scoring using criteria since it’s automatically calculated.
Edit scoring
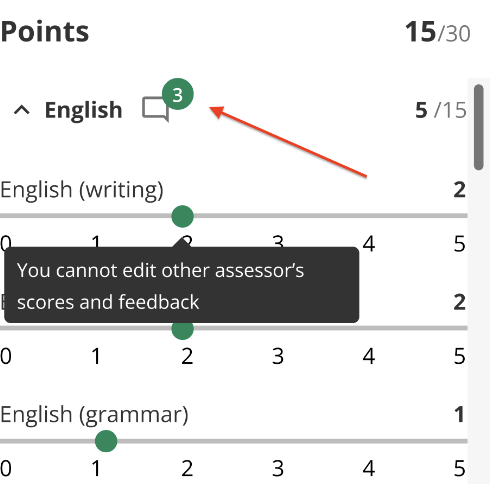
It is possible by clicking on 'assess mode' to switch to 'Edit score'. This option allows you to do some partial options which are also possible via rescoring, such as:
- The max score
- The title of the criterion
- The score of the criterion
- Delete the criterion
- Add a criterion
- Add sub-criterion
It is possible to edit the criteria if the following conditions are met:
- No one has scored this question before, i.e., you are the first marker to score this question, or you are the only marker assigned to this question.
- Required permission for rescoring in coordinator > Assessor tab > rescore
- Only for essay and file response questions.
Editing scoring functionality currently works only for essay and file response questions. This feature is not yet supported for autoscored question types, but support for these types will be available soon.
Navigation

Navigation options are placed at the top of the question/response area to navigate vertically (Next question, same candidate) or Horizontally (Next candidate, same question)
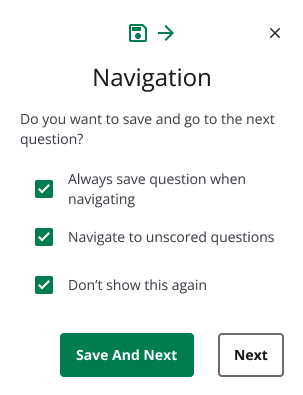
The fastest and easiest method to score and navigate through questions is by:
Set score > navigate to next question or candidate > A prompt will be given where you can choose:
- Always save question when navigating > this will skip the step of saving it each time
- Navigate to unscored questions > It will go to the next unscored question, so you will not be distracted by already scored question or auto-scored questions. If all questions are scored, it goes back to the default of showing all the scored questions.
These navigation options will be saved within your session, the next time you login again, you can set it again.
If you have chosen the 'Navigate to unscored questions' you will always navigate to an already scored question by viewing the candidate overview (1 step back in the breadcrumb, but also via the search option:
Search: A dropdown appears when clicking in the search field, allowing you to toggle between viewing by candidate or question (default). Search by title, text, or ID of the question. Search by candidate using the user name or user ID.
- By question: It will show all questions that you are set to mark for the candidate that you are currently viewing. In the below example the candidate you are viewing have 8 questions in total, 3 of them still needs to be marked (grey circle), 3 of them have been marked (checkmark) and 2 are auto-scored.
- By candidate: Here you will see all the candidates you are set to mark. If you have completed scoring all questions for a certain candidate, then a checkmark will appear. The number next to the candidate represents how many questions you still need to mark for each candidate.
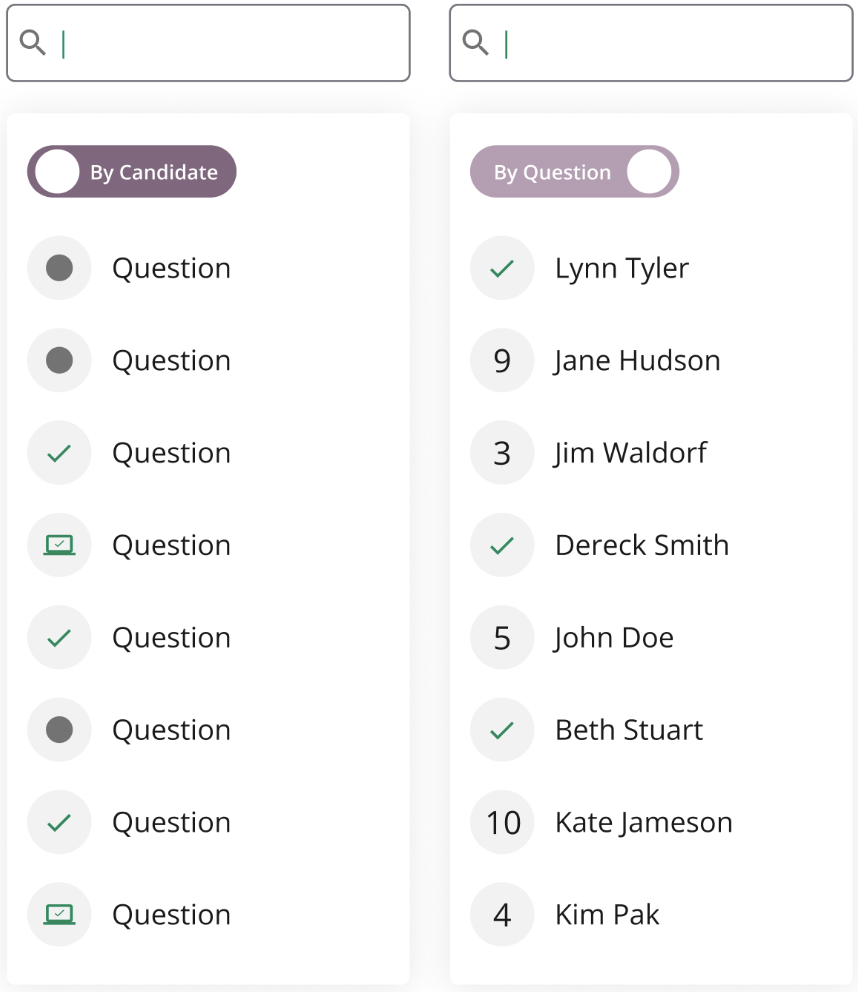
When clicking in the search field, a dropdown will appear. Here you can toggle between viewing by candidate or by question (default).
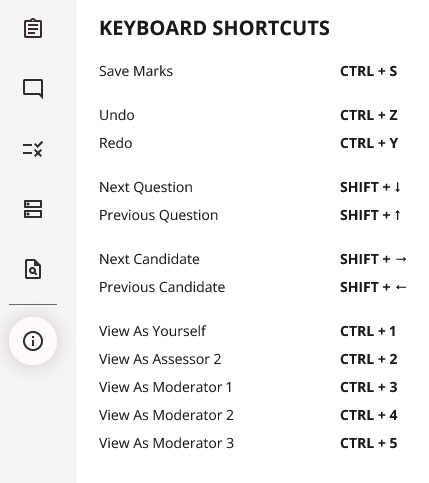
Keyboard shortcuts
Keyboard shortcuts assist you as well to navigate more easily. You can always view the options in case you might have forgotten it.
Feedback
On the scoring panel, markers can provide general feedback to candidates. This can be written in the input field, attached as a file, or recorded as audio or video (maximum 2 minutes). All the files or written text will be shown to the candidate if it the results were shared in a later stage such as a candidate review session.
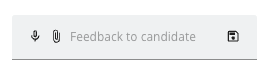
Written feedback
Leave written feedback for the candidate. There is room for a max of 500 characters. In case more feedback is needed you can also attached a file as feedback
Attached as a file
Leave feedback as an attached file.
Supported file types: Word, Excel, PowerPoint, PDF.
Max file size: 50mb for each file
The maximum number of files that can be attached is 3.
Recorded as audio/Video
There can only be 1 audio recording and 1 video recording. The maximum duration for a recording is 2 minutes and can be recorded directly from your computer if you have given the permissions to share your camera or/and microphone on your device.
When and who can see this feedback
By default the 'Feedback' is always shown to the candidate and also to authors who have access to their results.
However there are a few options:
- Directly after exam: In the assessments options you can choose to show the results after the exam has been taken in combination with showing the 'detailed' information. This method is not ideal for manual scored questions where you are likely showing feedback
- After publishing results: If you have chosen the option 'When assessor decide', the moment you are publishing the final results, it is still possible to show it on the candidate dashboard. Also in this case you need to have the 'Detailed' option turned on in the assessment options
- Candidate review session: The most used option is when you set up a [candidate review session] after publishing the results,(https://help.cirrusassessment.com/docs/candidate-review). If the 'detailed' option is turned on in the candidate review, the feedback will be shown to the candidate.
For Authors they will have access, as soon as they have access to the reports > Candidate results
Working together
Viewing annotations from co-assessors
Required permission: This functionality is only available if the "Share assessments between assessors" setting is enabled by the coordinator under Settings.
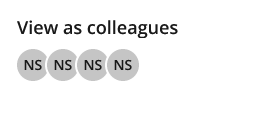
The scoring panel shows the co-markers (assessors and moderators) assigned to score the same question by showing their profile picture or initials at the bottom. With one single click you can see the annotations and feedback of a co-marker. This view will present a view only screen.
For moderators it is also possible to view annotation/feedback, however in this case you need the permission 'Show assessor annotations' in the settings page of the coordinator. This is recommended to use.
Comments vs. annotations
Comments are used for internal communication about any question type and are not shown to candidates. Annotations, used for essay question types, highlight specific areas in responses and are visible to candidates, see scenarios above.
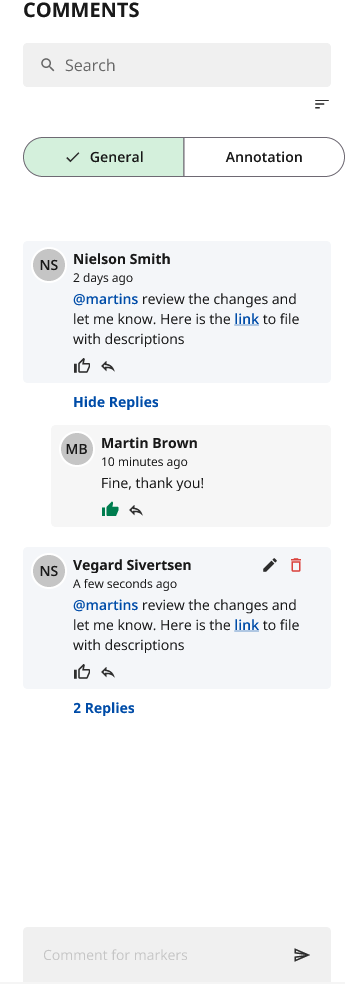
General comments
Clicking on the Comments icon shows a list of comments sorted by the latest at the top. General comments allow assessors to interact socially about a score or leave comments for themselves.
Filter options:
- All assessors (default)
- Name of each assessor/moderator
Coming soon: Tagging of people
Annotation
Annotation allows markers to highlight candidate responses, comment on these highlighted sentences, and connect them to a criterion. The marker can highlight a piece of text, and a pop-over will appear, giving the user the choice of providing feedback on the selected text.

Currently annotations are only supported on Essay questions, if you have more interest on having annotations on file response and/or office365, please contact us via our customer portal
Pre-defined comments
There are a few pre-defined comments for quick use, such as Source?, Off-Topic, Good, Grammar, Disagree, Rewrite. Currently these are not customisable
Add criterion to annotations
Assigning criteria is optional. The criterion dropdown will only appear if the question has assigned criteria. The dropdown shows a list of available criteria, with sub-criteria indented slightly.
When an annotation is connected to a criterion, the number of annotations connected to each criterion is displayed.
Example image
Visibility
Visibility allows you to make comments visible to all (default) or only to markers (toggle).
- Only markers: Annotations are visible only to markers and not to candidates.
- All: Comments set to 'All' can be shown to everyone during a candidate review session if 'Show annotations' is enabled.
There are 3 scenarios where annotations could be shown:
- Directly after exam: In the assessments options you can choose to show the results after the exam has been taken in combination with showing the 'detailed' information + show annotations. This method is not ideal for manual scored questions where you likely are showing annotations
- After publishing results: If you have chosen the option 'When assessor decide', the moment you are publishing the final results, it is still possible to show it on the candidate dashboard. Also in this case you need to have the 'Detailed' option turned on + 'Show annotations' in the assessment options
- Candidate review session: The most used option is when you set up a candidate review session after publishing the results,. If the 'detailed' option is turned on in the candidate review + 'Show annotations', the annotations will be shown to the candidate.
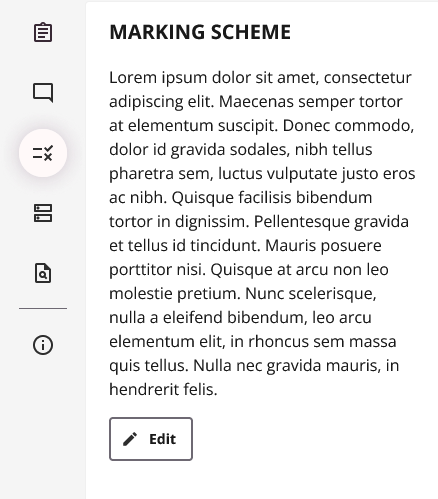
Marking scheme
The side panel allows showing the marking scheme to assist with scoring. Users with 'Edit marking scheme' permission set by the coordinator can edit the marking scheme.
Section
If a section is attached to a question, markers can view the section as displayed to the candidates.
Plagiarism
In case plagiarism was used in the assessment it will provide the plagiarism percentage and also you are able to check a more detailed report, by clicking 'Show report'.
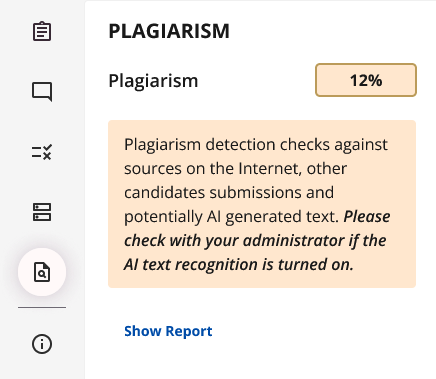
More information can be found via the article about plagiarism
Drawing tools & undo/redo
You can already see a sneak preview, however these tools are not yet available and will be coming soon.
Frequently asked questions
Q: Who can see the feedback?
A: Only if you are sharing the results directly after the exam, after publishing or via a candidate review, the feedback will be shown to the candidate.
Q: Who can see the annotations if I set it for all?
A: It is a combination of two options:
- If you are showing the annotations directly after the exam, after publishing or via a candidate review by selecting the option 'Show annotation's
- As a marker you need to make the annotations visible to ALL.
Q: Can I customise the pre-defined annotations?
A: No, currently it is not possible to customise this. We welcome feedback on this.
Q: I cannot change the score by clicking on the 'assess mode' slider?**
A: This might be because of one of the few reasons below
- No one has scored this question before, i.e., you are the first marker to score this question, or you are the only marker assigned to this question.
- Required permission for rescoring in coordinator > Assessor tab > rescore
- Only for essay and file response questions.
Q: I cannot find my co-workers Annotations
A: A required permission: This functionality is only available if the "Share assessments between assessors" setting is enabled by the coordinator under Settings.
The scoring panel shows the co-markers (assessors and moderators) assigned to score the same question by showing their profile picture or initials at the bottom. With one single click you can see the annotations and feedback of a co-marker. This view will present a view only screen.
For moderators it is also possible to view annotation/feedback, however in this case you need the permission 'Show assessor annotations' in the settings page of the coordinator. This is recommended to use.